Hip Side Lift Series
Hip Extension Series

Hip Side Lift Series
Hip Extension Series
Band Core – Seated (4-way)
SA Band Core – Seated
Band Core – Standing (4-way)
SA Band Core – Standing
Band Core- Split Stance (4-way)
SA Band Core – Split Stance
Band Core – Half Kneeling (Supported:Unsupported)
Supine Hip Bridge Knees/Feet In/Out Hip Flex/Knee Ext (Dorsiflex or Plantarflex)
Supine Hip Bridge Knees/Feet In/Out Hip Flex/Knee Ext Hold and Knee Ext/Hip Flex Hold (Dorsiflex or Plantarflex)
Supine Hip Bridge Knee/Feet In/Out Hip Flex/Knee Ext hold (Dorsiflex or Plantarflex)
Side Pillar Hand/Feet Staggered Hand Hip/30 Deg/Arm Fan/Hip Flex
Side Pillar Elbows/Knees Hand Hip/Arm Fan/Hip Flex
Side Pillar Elbow/Feet Hand Hip/30 Deg/Arm Fan/Hip Flex
Supine Hip Bridge – Ft/Knees In
Supine Hip Bridge – Ft/Knees Out
Supine Hip Bridge – Ft In/Knees Out
Supine Hip Bridge – Ft Out/Knees In
Supine Hip Bridge w/ Side Band
Supine Hip Bridge Leg Lift Series
HIP BRIDGE – HIP FLEX/KNEE EXT
HIP BRIDGE – KNEE EXT/ HIP FLEX
Prone Opposites
Kneeling Opposites
Kneeling Opposites – Leg Extension Fan
Kneeling Opposites – Arm/Leg Fan
Pushup Series
Arm Out Crunch
SL CRUNCH – 80 DEG HIP FLEX
SL Crunch – 10/80 Deg Hip Flex
Alt Leg Crunch
Lateral Crunch
Hip Rotations
Basic Crunch – Side Bender Iso (band resist)
Basic Crunch
SL Crunch (80deg hip flex)
Supine Leg Lowers – Double Leg
Supine Leg Lowers – Alt
Supine Leg Lowers – Opposites
Feet up Crunch Series
Frog Crunch
Recline Position Series
Reverse Crunch
Basic Crunch (Manual Resist)
Basic Crunch – Side Bend Iso (band resist)
Rhythm March Series (Prep)
Rhythm Lunge Series (Activation)
Sumo Squat Series
Sumo Squat Out Series
Adduction Rhythm Series
Stationary Lateral Lunge Series
Moving Lateral Lunge Series
Drop Lunge Series
Back Pivot March Series
Back Pivot Skip Series Activation
Hip Rotate March Series (Prep)
Hip Rotate Skip Series (Activation)
Hip Rotate Raise Series (Motion)
Knee Punch Series (Prep)
Knee Hug Series (Prep)
Buttkick Raise Series (Motion)
Walking Lunge Series (Activation)
Walking Extended Lunge Series (Activation)
This is the single most important aspect of being an actual TRAINER or COACH, as opposed to a MONITOR. Too many times coaches get caught up in writing a “perfect individualized plan” for a client or a group of clients. Then they get caught up just “answering questions” of what each exercise is with clients, as opposed to actually COACHING the reps of the exercise.
Sell clients on what’s truly important – vary the exercise to fit the client; DON’T change the exercise to fit the client. The coach/trainer should spend quality time coaching the different INTENTIONS of the variations of the exercise, and assigning proper loads for each client – which is really pure individualization.
Respect your craft by being highly educated to gain the respect from your clients, assistants, employees, interns, etc. Highly educated goes BEYOND just your “degree and certification.” It’s constantly pushing the limits of your own knowledge of current research and literature and presented materials, how to apply it, and taking steps to “re-direct” your applied sciences into the research and academic communities.
In terms of your clients, teams, and/or athletes – they respect your knowledge above ALL. And most importantly – increase your ability to APPLY this increased knowledge. If you don’t respect your profession enough to stay on top of current educational platforms out there, you will never gain the respect from your clients/teams that is required for you to be truly successful.
This is not a “meathead aspect” of increasing squat and bench. Which categories you choose to focus on with your clients/athletes is the true individualization of your program. However, the theory is the same – maximize as much strength as possible. Have an understanding of each of the variables – INCLUDING which ones apply to athletes and general population:
One of the most successful businessmen I’ve ever had the pleasure of working with gave me a speech one time that I will never forget. “For the first 7-10 years of your career, base all of your experiences and employment choices on one factor – work for, and under, people that have proven to be successful in your chosen industry.” I reflected on every choice I made from day 1 – Every single choice I made was motivated by the fact that it provided me with a unique opportunity to LEARN and GROW as a coach, a professional, and finally an entrepreneur. I literally did this for about 7-10 years. Learning about the backgrounds of so many colleagues that are actually SUCCESSFUL made me understand every single one of them followed a very similar 7-10 year plan – whether it was planned or not.
Even if you are having initial success as a young business owner or head strength coach at a small high school or university: if you haven’t learned how to effectively MANAGE people, systems, finances, schedules, profit centers, administrators, sports coaches, athletic directors, etc., etc. – your success will be short-lived. Success comes with extensive experience – and the right guidance comes from the right people. There’s really no way around it and no shortcut through it.
This could honestly be the most important aspect of this list. Note the divide in the industry. One side of the issue is the hard-core “research crowd” that believes that EVERYTHING MUST be “proven” in a laboratory setting before it can be applied. The other side of the issue is that hard-core “application trainer” crowd that believes “application is always ahead of research.” Therefore, success is done by trial and error, and research doesn’t have any place in “real life.”
Our approach is actually fairly simple:
Note that technically both sides have great points – but both sides need to have a medium ground with their way of thinking. READ research and literature and DEVELOP an applied interpretation – but ALWAYS RE-DIRECT. Don’t focus too much on either side, and ALWAYS play a role in the progressive bridging of the gap.
![]()
You will always have certain principles that you believe in from resistance training, cardiovascular, movement, recovery, nutritional, and preparation aspects. You instill these principles into your clients/athletes on a daily basis. The best way to learn and perfect the teaching of these aspects for compliance is to practice what you preach. Not following the EXACT protocols and programs – but by implementing the philosophy into your overall fitness profile.
This is one of THE definitive concrete principles that truly defines the Bommarito Performance System and Bommarito University brands. Breaking down to the ultimate simplicity, muscles CONTRACT, RELAX, and they have a THRESHOLD. As performance coaches, we need to enhance:
TRAIN THE MUSCLES, DO NOT ATTEMPT TO “TEACH” OR “RECREATE” MOTIONS IN SPORT.
Consistently having this though pattern will allow for more efficient planning of:
Having full understanding of neuromuscular therapy will allow for many important aspects of knowledge that is essential to becoming a high-level professional coach – including, but not limited to:
Business in this industry is centered around one important factor – MANAGEMENT. There are many forms of management, but elevating yourself from a great coach/trainer into an actual professional is management. Management of:
Keep in mind that each one of these points is not just related to the private sector. It’s applicable to every single profession in the fitness and performance coaching industries. Even in the professional/collegiate sectors – if you truly research the most SUCCESSFUL coaches with significant history of job security – they have an incredible ability to MANAGE (including selling).
CHECK OUT THE FULL 10-PAGE ARTICLE INSIDE OF BPS UNIVERSITY
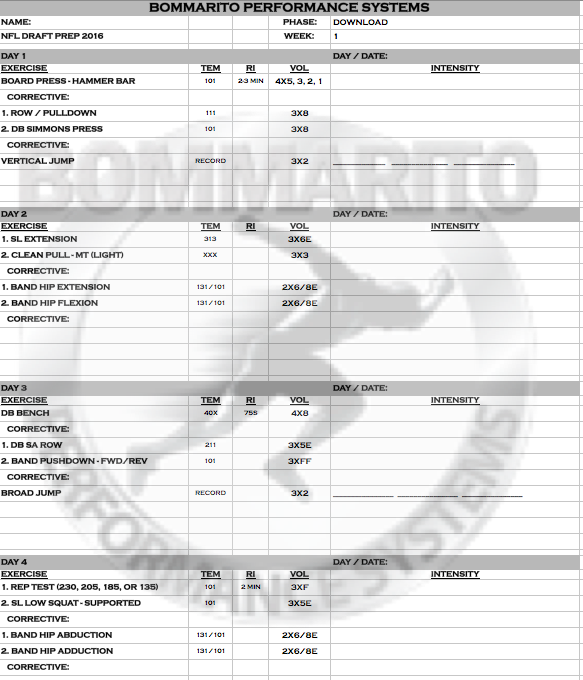
After week 4 of draft prep training, most athletes will be due for a downloaded lift in the weightroom. With this basic download lift week, the focus is to bring the volume down for upper and lower body days. Depending on the athlete, downloading the lower body and uploading the upper body may be appropriate. During this time of the year athletes will be invited to play in collegiate bowl games. If an athlete attends this week-long game he will not lift for that week and therefore, that counts as his download week. The low volume and/or no lift, allows the body to actively recover from the previous weeks of conjugate dynamic. Upon completion of this week, the athlete will be ready to increase the strength plateau by advancing into the next strength/power and power/strength phases.
The strength/power phase focuses on a big increase in intensity with emphasis on strength slightly more than power development. The first upper body day 1, with “clusters,” increases pressing strength dramatically. Pulling and elbow extensor volume is increase for more upper body strength, power, and endurance. The lower body days are designed to potentiate power output. Many resisted jumps paired with free jumps are effective in this phase. This jumping power will also transfer to the sprint training, which is preparing the athletes to peak in a few weeks.
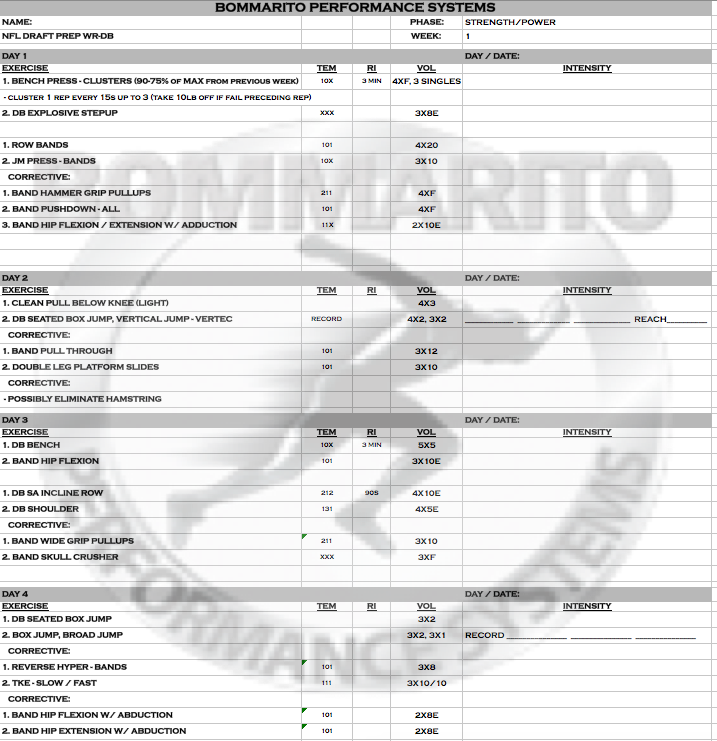
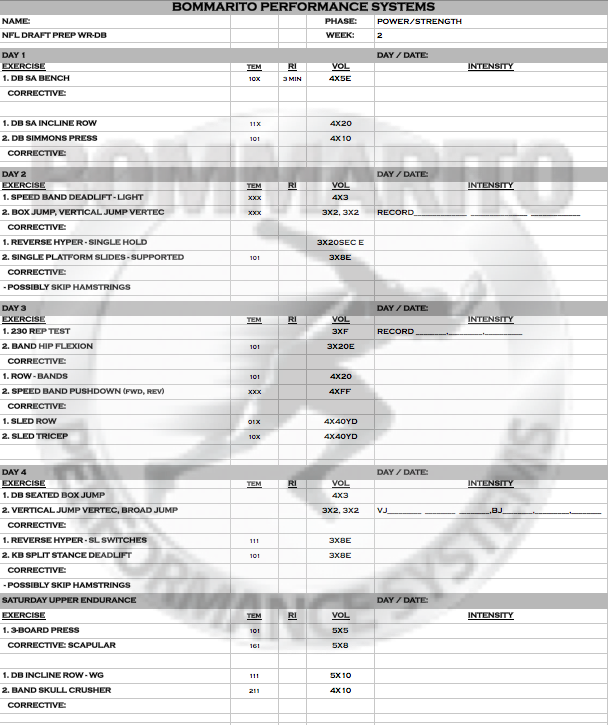
The following power/strength phase focuses more on power output than strength gains. The previous weeks have prepared the muscles for massive gains in hypertrophy and strength, leading the athlete to peak performance for maximum power. Upper body days emphasize pushing power and realizing new plateaus for the 225lb bench press rep test. The lower body resisted jumps and clean pulls are light to focus on potentiating power through faster movements. Then, realizing the new plateaus for the broad and vertical jumps.
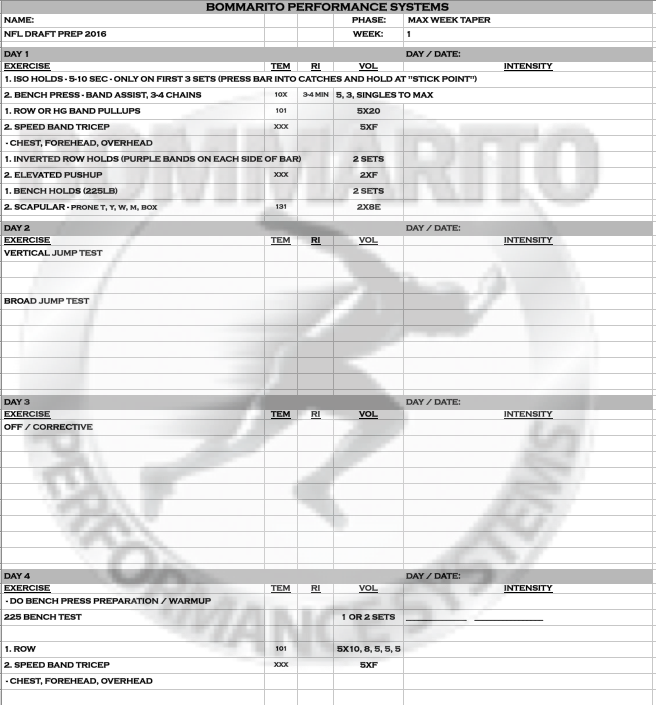
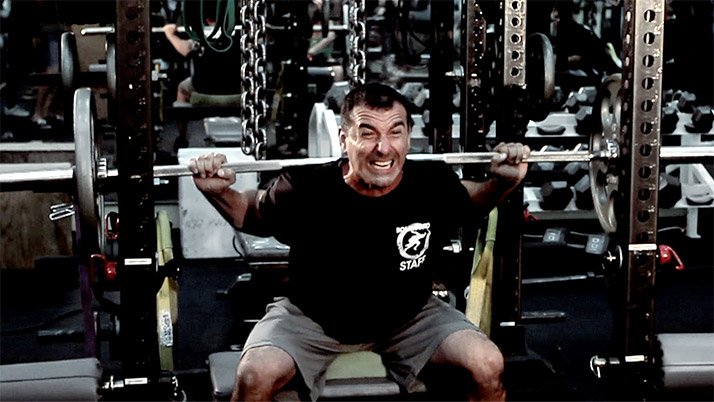
The final strength phase is the max/taper phase, which focuses on upper max strength through heavy weight with a power component by adding chains. Most of the pushing is fast and pulls are reflexive. The inverted row holds are designed to isometrically strengthen the muscles that are contracted at the bottom of the bench. This isometric strength will produce a more powerful stretch reflex on a 225lb bench press rep test. The 225lb bench holds are designed to isometrically strengthen the muscles involved in keeping the bench press body position base and elbow extensors that are keeping the arms straight. This strength will allow the athlete to have a temporary regrouping moment to make sure the body is properly positioned to perform single repetitions under fatigue during the end of an actual 225lb bench press test.
Pure athleticism stands out more than anything at the NFL Combine. In many cases, it’s the difference between being selected in the first or second half of the draft. Translation: It could make or lose you millions of dollars. Nobody knows how the draft will unfold, so take every measure and answer every question by taking your broad jump off the charts.
The broad jump expresses horizontal power, which is more specific to football motions than vertical power. Vertical power helps you go up for a ball, bat down passes or hurdle defenders; horizontal power helps you cover the full 5300 square yards of the ironed grid. A pure acceleration step expresses horizontal power.
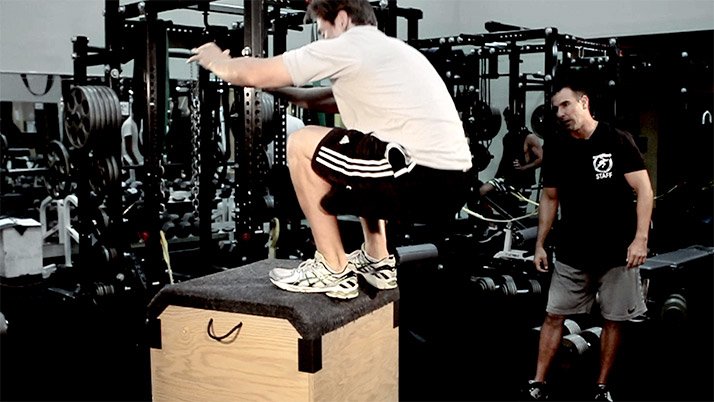
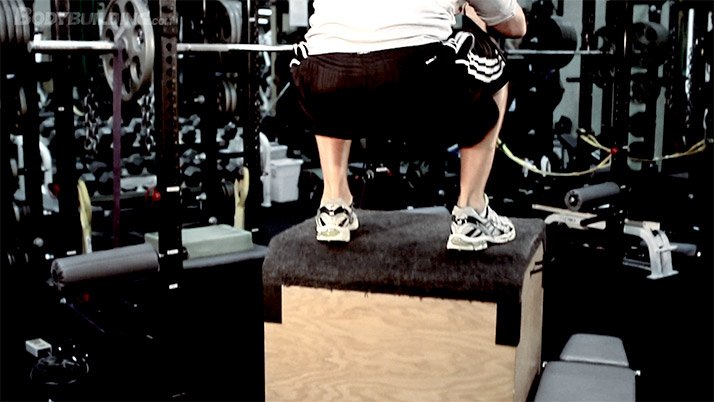
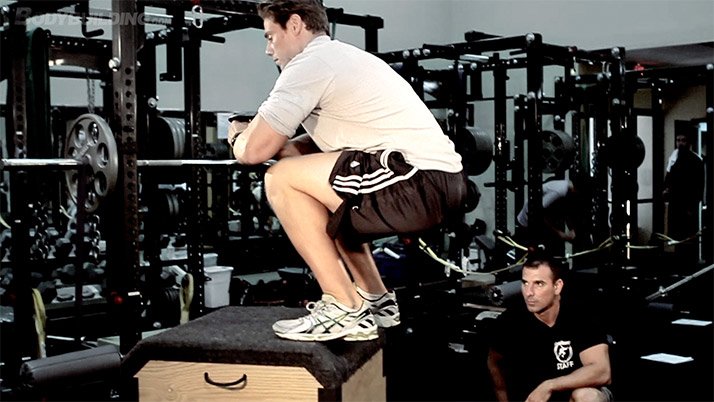
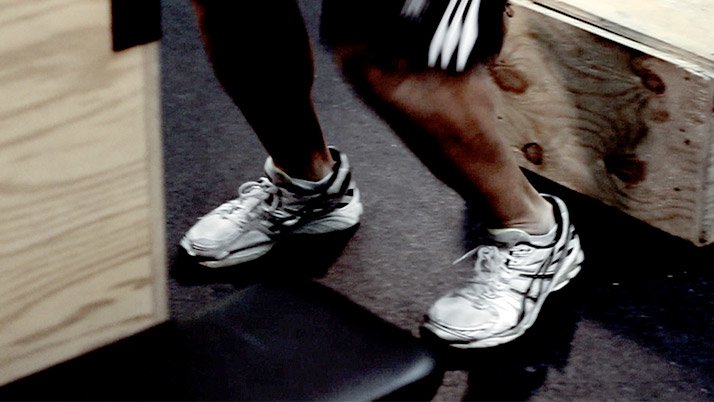
Bommarito Performance Systems uses the box broad jump as a pure expression of horizontal power, and to soften the impact of landing. Landings put the lower body through excessive joint load you don’t want to consistently repeat. There’s no better way to soften the landing than to jump onto a box, rather than letting gravity take you hard into the ground.
There’s no quick progression. Shoot for micro progression within what a person is able to do at that particular moment. If they can safely land on the box, that’s the proper distance.
Start three feet away from a 30-40-inch-tall box, then micro progress the box higher and the distance farther. Perform it once per week toward the end of the program to soften the joint load and master the technique. The rep range is 1-3 with 4 super sets comprised of heavy or speed squats that will also be your rest period.
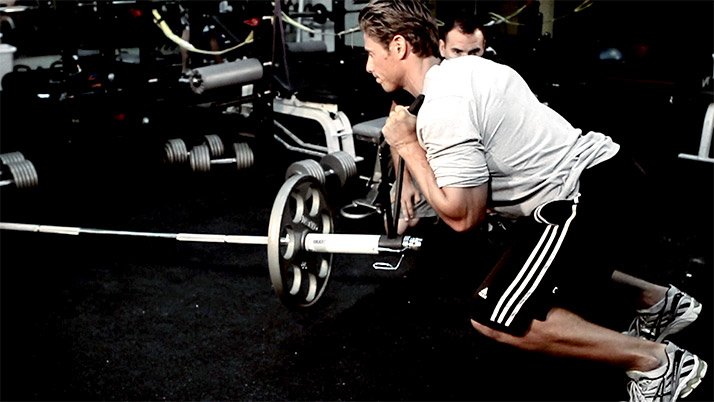
The Landmine Linear Jammer is a BPS favorite because it’s a great way to micro progress through an external load of horizontal power. The Landmine Linear Jammer looks a lot like the jump position used for the Box Broad Jump (erect knees, hips and ankles) before the jump.
The energy transfer created from the hips can be extended into the arms. It’s similar to a broad jump when you’re trying to hold the arms up and out for as long as possible, even into the descent before the landing. BPS works on jammers twice per week with 4 sets at 3-5 reps. Take 2-3-minute rest periods between sets to allow the nervous system to recover.
The landmine is a sleeve attached to a rack that a barbell can easily fit into, but can also be on a ground plate. A combat handle attached to opposite end of the barbell is an inexpensive, easy way to train linear power. There needs to be room between the plate and the combat handle (BPS uses PVC pipe as a spacer).
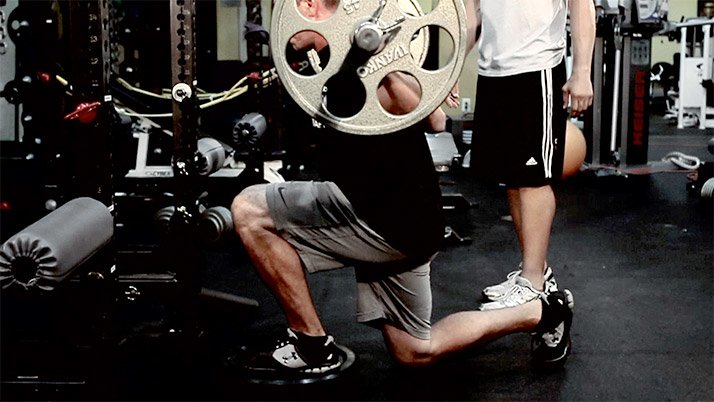
The elevated back lunge is a great single-leg strengthening exercise. There are several single-leg exercises that help you in the broad jump or any other athletic position, but the elevated back lunge is a BPS favorite because:
It’s easy to micro progress the overall load because of the weight on your back. Keep the rep range at 2-6 and perform 4-to-5 sets with 3-to-4-minute rest periods. Perform this twice per week to build maximal strength.
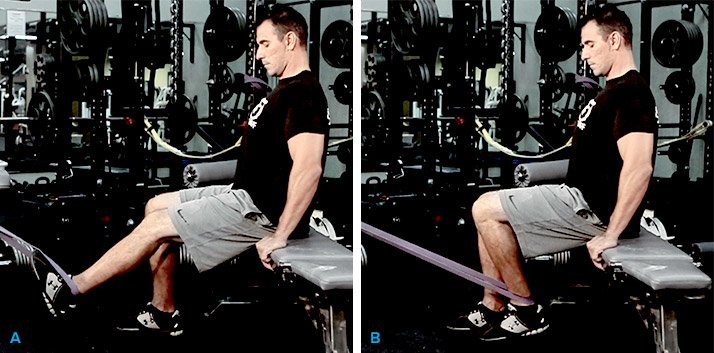
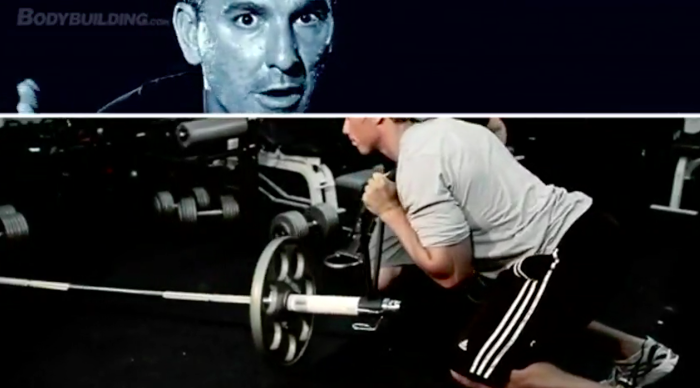
The Seated Band Hamstring Curl is simplistic and easy to control. You have to control pure knee flexion without external things like hip flexion and extension getting in the way of what you’re trying to accomplish.
Wrap the band around any type of solid post and micro progress by moving the band up or down. Moving the band creates a different type of arm movement, which adds resistance at different angles.
Attach the band to the post at hip level because it’s easy to control. Loop the band around your leg. As you come back, the load will vary because you’re coming into more band resistance and knee flexion. This exercise can also be done with a machine or a partner. It’s all about isometric control of your pelvis. You don’t want the pelvis to shift; it takes away from the goal of the exercise: to strengthen the knee flexors.
Perform this exercise twice per week with 4-or-5 sets at 2-6 reps and rest for two minutes between each leg to create time under tension.

Leaping high into the air can help you become a better football player. High leapers can receive up-for-grabs passes, a Hail Mary, or block a kick, bat down a pass or bound over defenders.
But, NFL scouts agree: the vertical jump is the most overrated test at the NFL Combine. Instead, scouts look for vertical power potential; the vertical jump is just the clearest way to determine it.
Many players go about it all wrong. They practice under a Vertec Vertical Jump Trainer (the device used to test athletes’ vertical power potential). That gets you nowhere. Don’t train for the test, train your body to complete the athletic movement the test tests. Express your true power potential by developing a powerful jumping foundation.
Every move you make in football requires power output. You can’t express an exact motion of power that’s going to be football-specific in terms of tackling and blocking. Start with basic power expressions, build on them and make it sports-specific.
Bommarito Performance Systems teaches vertical jump exercises at the end of a training cycle because they are easiest to learn. BPS loves to use potentiation (power development; increased effectiveness). BPS potentiates power development with heavy, loaded lower-body exercises (split squats and elevated back lunges).
When you develop neural activation (when workouts become routine) go right into power potential exercises. It’s almost like a complex superset. Do a heavy set, immediately followed by one of the power exercises, take a rest period and repeat.
The Variable Load Speed Box Squat series is only done once per week. BPS performs it once every 10 days because it’s neurologically taxing. You do yourself a disservice if you try to execute dynamic box squats many times within a set (never do more than two reps during a set). Perform multiple sets (up to 14) with a 1-minute rest period.
Allow the nervous system to regenerate, but never let it fully recover; keep rest periods short. Regeneration allows you to execute the same power potential for every set, to build power endurance over time.
Band tension varies the load on the bar, but not the resistance. If you have 135 pounds on your back while standing, it’s 135 pounds. When you squat down and stand up, it will be 135 pounds plus whatever band tension you have. Going down through the squat releases band tension; the bar becomes lighter at the bottom and heavier at the top. That variable load provides the acceleratory component of concentric power. It’s all about making the bar heavier as you rise from a squat to a standing position.
Use these tempos to get the most out of the exercise. The first number indicates eccentric action duration, the second indicates the pause duration and the third indicates how fast you rise.
(The X indicates exploding up and the * indicates exploding down)
The arms lead the hips during a jump, just as they do when you run. Teach arm leading with Box Jumps for two reasons:
BPS uses box jumps during every lower body day. This technique is invaluable if you’re training for the NFL Combine with only 6-8 weeks of preparation. Keep the reps short at 2-3 jumps per set. Execute 3-10 perfect sets without shuffling your feet through the decent or accent and try to micro progress week-by-week.
Dumbbell Seated Box Jumps are similar to regular box jumps. The only difference: you use pure concentric power, because there is minimal eccentric loading. You begin fully erect and descend into an eccentric load, using the stretch reflex as a huge component. The only stretch during a Dumbbell Seated Box Jump is when your feet slam down into a plyometric action (using a bounding technique and trying to limit ground contact time).
Micro-progress the height of the jump and the weight as you become more experienced with the exercise. Adding weight makes the power expression more challenging and overloads the stimulus. Use weight that allows you to safely execute a jump. Never do more than three Dumbbell Seated Box Jumps at once. Perform one, rest and go again.
The Linear Depth Jump introduces a safe base-line plyometric without much joint loading. A competent base strength, comprised of muscles in the hips, quads and hamstrings, is effective. A solid transfer ties everything together and presents a good opportunity to time arm rip (arms leading the legs out of the jump).
Implement the Linear Depth Jump during the latter phases, after you’ve built a solid foundation. BPS adds Linear Depth Jumps during the last 2-3 weeks of a training period.
Floor Glute Ham Raises strengthen knee flexors. It can be performed with no equipment (a partner can hold your ankles down).
Eccentric loading during this exercise is crucial for pelvis control (watch for excessive hip flexion). Starting on a leg curl machine or doing glute ham raises helps hip flexion, but you want to maintain that hip flexion as you go through the knee flexion and extension exercise.
That type of control is important and easy (use yourself as resistance). It helps people to micro-progress through the exercise. Knee flexion strength can be related to almost every athletic motion, but it’s extremely important to maximize jumping ability.

Instructions:
1. Start in a lunge position.
2. Push body weight forward, maintaining speed as you push the weights. Switch legs after five reps and repeat.
3. Switch to an athletic stance, legs hip distance a part.
4. Push weight forward using one arm. Switch arms after five reps and repeat.

Instructions:
Power Sprint
1. Hold sled with straight arms tightening trunk, contracting glutes and locking ankles. Pull big tow to the top of your shoe while maintaining balance on your toes. Hold for five seconds.
2. Maintaining the same position, alternate high knees two times.
3. With high knees, accelerate forward pushing the sled for five yards.
Arch Run
1. Start with a three to five yard sprint towards the arch.
2. On command, run around the arch staying as close as possible.
3. Burst forward out of the arch turn for five yards.

1. Start on one side of the ladder. On command, quickly step laterally through ladder.
2. Once through, pause and hold position of a second to absorb force.
3. Continue to step laterally through ladder and repeat steps.
4. Run same drill without the the pause.
1. Set up three cones in a triangle. Sprint towards cones.

Instructions:
1. In a full sprint moving to laterally your right, quickly step your left foot behind you.
3. Perform a lateral run for 10 yards, focusing on accelerating off the ends of the feet.