Weight Room

Implement The Basics

Trunk / Spine Isometrics. Seated

Standing, Split Stance, Half Kneeling (supported or unsupported), Half Kneeling Alignment. can go all 4 directions on the trunk. Or Single Arm (SA) – (Fwd or Bck)

Shown here SA Seated (primary focus spinal rotators isometrically.

The trunk rotation strength has numerous ESSENTIAL aspects. Shown here; w MLB for rotary patterns. Any other sport w heavy rotatory motions (softball, boxing/combat, tennis, golf, etc). General fitness / wellness for right / left symmetry for proper joint health and optimal muscle function

But take it a step further with regards to SPRINTING (or jogging or running). It’s obvious that on multidirectional motion, pelvic approximation leading into spinal rotation is important. But what about straight line linear sprinting.

Think about what happens with the leg cycle ar a max effort Sprint (especially one that comes close to or exceeds 20mph). When the leg comes through recovery phase (backside mechanics), the MOMENTUM of that leg motion puts emphasis on the spinal lateral flexors. Hence if the spinal lateral flexors are strong enough isometrically , they can withstand this momentum force. If NOT, it can drive that side up into a “hip hike”, causing a sub-optimal over-stride. The REASONING that Band Iso Trunk (lateral) is so important – strengthen the spinal lateral flexors.

Now, take this concept a little further. When the leg cycles from recovery to transition phase (and eventually into ground prep phase), the MOMENTUM of that leg action puts emphasis on the spinal rotators. Hence if the spinal rotators are strong enough isometrically, they can withstand this momentum force. If NOT, it can drive that side into a “pelvic rotate”, causing an extreme oversteps. The REASONING that Band Iso Trunk – SA is so important!

So this goes beyond simple “trunk strengthening”. This cam also be a extremely EFFECTIVE prep IMMEDIATELY prior to intense max effort sprint work.

Bone Growth-Youth Development

Here might be the most commonly asked question a strength & conditioning professional must answer to youth athlete parents.

Question:

“Will my 13 year old child (or younger or teenager) have a stunted growth from lifting weights?”

Answer:

It depends.  It depends if the athlete is exercising biomechanically correct or not.  Stunted bone growth may occur when the open growth plates located at the ends of bones become damaged.  Damaged open growth plates can happen for various reasons, which include an injury from sport or poor exercising technique.  For example, if a 12 yo athlete playing soccer sustains a trauma to the knee in a soccer game, he/she could incur growth plate damage around the knee.  Another way an athlete can sustain growth plate damage in the knee would be biomechanically incorrect weight-bearing exercises.  Say a 10 yo athlete is front squatting and during every repetition their right knee caves in with a valgus moment.  If an expert S&C coach is not there coaching the athlete out of these poor mechanics, overtime knee growth plate damage might occur before the plate close.  However, most youth athletes will not experience growth plate damage from training or in sport as long as qualified professionals are monitoring exercises.

It’s important to develop youth athletes through sport and training participation because their young bodies and minds are like sponges and we want them to learn exercise technique and proper nutrition before they may learn bad habits.  To avoid growth plate damage in young athletes, their training should be focused on light loads (body weight or light weights) so they can learn the intention of each exercise.  When an athlete is below the age of 13 yo, they benefit tremendously from learning proper biomechanically correct exercise techniques and become strong through a long amount of isometric exercises.  Before weight is increased for the youth athletes, volume and isometric times should be increased substantially so proper technique is reinforced and the athlete naturally performs exercises biomechanically correct.  These exercises may include squatting, pressing, pulling, running, and jumping.  Typically we find that athletes starting to exercise around 5-8 yo will become strong enough and biomechanically adequate for progressive resistance training when they reach 14 yo.  Also, at this point, the growth plates are still open/undamaged and these athletes will start peak height velocity (puberty). 

Surges of hormones, including testosterone, are beginning to flow through the athlete naturally.  This is the ideal time for athletes to exercise with heavier resistance and advanced plyometrics.  With the surge in hormones and advanced strength and conditioning volume combined, the athlete will experience hypertrophy of lean muscles, increased bone density, length, and girth as well as other bodily tissue growing.  Sometimes, an athlete will grow rapidly and the muscles become stretch so fast that the brain has a hard time communicating to or controlling the muscles during this growth.  In this case the athlete will become clumsy or uncoordinated (you may have this seen this with young basketball players).  However, if during this time that same athlete were in a proper training program, especially involving isometric exercises (pillars or infant squats), their muscles would remain strong and would not become as clumsy.  During this time of puberty, the athletes’ recovery time will be much more rapid allowing them to endure progressive amounts of volume from day to day and week to week. 

To some it all up, participating in unsupervised training or with unqualified coaches could potentially put youth athletes in scenarios that could damage growth plates.  Again, few youth athletes experience stunted growth and damaged growth plates and these rare occurrences from improper movements should not detour youth athletes from exercising young.  The benefits a youth athlete receives from intelligent training and sport play are far too valuable to be passed up.  There are many brilliant minds and a plethora of scientific research that shows bone growth will be improved (sometimes more than genetics had planned) rather than stunted through biomechanically sound youth training.  Depriving a youth athlete from proper training before, during and after their peak height velocity is doing that athlete a major disservice and could potentially cause that athlete to never reach their full genetic potential. 

For more information join our BPSU and go research and study the work of Istvan Balyi (an expert in long term athlete development).

ADD SOME VARIETY TO YOUR TRAINING!

We’ve been approached by countless people over the years with the same standard questions about fitness, training, and overall health. These questions get asked by everyone: people who train themselves but are advanced and experienced, beginners looking to get started, even high level athletes.

1. What is the best way to lose weight?

2. What is the best way to get toned?

3. What is the quickest way to get “in shape” for just general, overall good health?

There is countless ways to answer those questions. However, one specific answer that will relate to all of the above “common questions” – Power Endurance and Variety within the Power Endurance cycles.

Power Endurance
Strength can be easily by understood by how much weight can you lift. Power is how fast you can lift a particular weight. Power endurance is how long can you sustain a particular level of power output. It has been proven in numerous scientific studies that Power Endurance intervals is the most efficient way to lose weight, get toned and increase our overall cardiovascular fitness.

For all you people that are timid of “lifting weights” or you just prefer alternative exercises: your body weight is a weight (hence, body weight exercises can be very effective if done properly); a resistance band is a weight; air resistance (like on the KEISER machine) is a weight. These types of weighted resistance can be very effective at providing good solid intervals for Power Endurance.

There is literally thousands of exercises that can be done for power endurance with body weight, air resistance, and bands. We are going to focus on three effective exercises that can be incorporated into any Power Endurance Circuit

Keiser High Rotation
Set a comfortable resistance, choose a power output level, and then try to maintain a certain percentage over time. All of this can be seen on the digital readout on the Keiser Machine.

From the start position, drive through the resistance in the rotation shown as fast as possible, return to the to the start position and repeat.

Time on: 30 seconds
Time rest: 30 seconds
Total sets: 10-20 (5-10 each side)

Band Low Row
Choose a resistance band that you can comfortably perform the low row action with maintaining good form and proper posture. Set the resistance level accordingly (how far you anchor the band to your body). From the start position (thumb down), quickly row the band towards your body rotating your thumb up. When the hand touches your rib cage, return to start position and repeat.

Time on: 10-30 seconds
Time rest: 30-60 seconds
Total sets: 10-20 (5-10 each arm)

Body Weight Explosive Step
Choose a box or bench height that you can safely perform the Step-Up action. From the start position, place your foot flat on the box (careful not to lift your heel), and then explosively step up onto the box/bench while driving your opposite knee up. Return to the start position and repeat. Alternate your arm action into the “running motion” as you perform the step up and return.

Time on: 30-60 seconds
Time rest: 30-60 seconds
Total sets: 10-20 (5-10 each leg)

“Abs of Steel”

Whether your goals are to strengthen your abs to be “ripped”, or not, having “abs of steel” will benefit any athlete or any person.  Having strong abdominal muscles along with a strong posterior chain will improve performance.  Performance could mean in sport or just general physical well-being.  Most of our abdominal work at BPS is performed with a slower tempo (232 or 323) since we want our abs under a lot of constant tension to stimulate growth and strength.

Below are 3 trunk & spine exercises that are a must for abs of steel.

  1. Stability – Side Hip Bridge (or Side Plank)
  • We can really target the lateral abdominal muscle to help further sculpt your abs and stabilize your trunk and spine.
  • First, assume the side hip bridge position.  Either with knees bent and on the ground (for beginners) or legs straight and on the lateral edges of your feet.
  • Place the elbow directly under your shoulder with your palm firmly face down on the floor.
  • Maintain a “big” chest and keep your head and toes pointing forward
  • Simply isometrically pause for a progressive amount of time
    • HINT: close your eyes and visualize your abs contracting.
  1. Strength – Reverse Crunch
  • This is an advanced exercise that will ensure “abs of steel”, if you can safely reach this level.  We recommend increasing volume with the previously mentioned exercises before exploring the reverse crunch.  However, this exercise may be progressed as well.
  • Lay in a supine position with the top of your head about 4 inches from a sturdy fixed object like a support beam or heavy bench. You will use the bench or pole to grasp with your hands for support during the exercise.
  • Next, bend your legs at the hips so the bottoms of your feet are facing the sky.
  • Now, push the small of your back into the ground so your abs contract and move the bottoms of your feet directly straight up towards the sky without letting your legs drift toward your head.
  • Again, this motion should be slow with a pause at the top and move slowly back down to the starting position.
    • Progress this movement from going straight up to slightly away from the head and up.  The farther you push your feet away from your head the more intense the contraction will be.  Once you can push your feet almost directly away from your head so your feet are only 10-12 inches above the ground you may progress further.  Now you may be ready to start by pushing your feet straight towards the sky then without returning to the start position lower your legs and feet until they are 10-12 inches from the ground and return to the position where your legs are reaching for the sky.
  1. Integrated Strength – Lateral Landmine Rotation
  • With this exercise you will be able to train your abs to contract through the entire range of motion while the trunk and spine undergoes rotation.
  • Here’s how: Place a standard Olympic bar into a “Landmine” or a crease so the bar doesn’t slide on the ground, yet the top end of the bar can move.  Place the bar in your hands so it is in front of your hips (the barbell be coming from your left side in this position).  Keep your left palm facing up and your right palm facing down as your grabbing the bar.  From here, keep your arms straight as you rotate the bar up and your left.  Once you slowly reach your end range of motion slowly return to the starting position.
    • HINT: never release your abdominal contraction during the rotation, not even at the bottom starting position. 
    • Progress repetitions, sets, and resistance

**For full video demonstrations of these abdominal exercises plus many more, sign up for our BPSU online university.  There you can listen to and watch coaching cues videos as well as have access to our entire database to build programs and get the best out of any athlete. 

HERES THE LINK: http://www.bommaritoperformance.com/workshops/bps-university/

Row Dissection: Progressions and Tools

Part 1: Restraint and Effects On Force Output

Keith Shimon MATcs

“What is the best way to row?”  “What is the best row machine?” “Are machines evil or bad, and should I only use barbells, dumbbells, bands, or body weight?”  

As professionals you hear a gamut of questions and exercise mythology.  Is there really a “best row?”   Maybe a “best row” exercise for a specific individual.  It all comes back to the question of “who is it for,” and “what is the goal of this exercise” (Purvis, 2013, Exercise mechanics lecture).   Through the years we have all been introduced to the standard ideology of what a rowing motion looks like.  I imagine that we also have a framework in our head of the basic rules we were told in order to get the most out of any rowing motion, and the specific muscles that the exercise may challenge.  In addition, we have favored machines, dumbbells, kettle bells, cables, bands, or body weight because we were told that it was the best way to row.

This article is the first of a series.  We cover the use of restraint, and the manipulation of restraint to vary the custom training response in the context of two row examples.

In later articles, we will examine the various tools, implements, and machines that we use, how we use them, and why we pick them.  Lastly we will discuss variations of exercises and the ideas behind the variation in order to create even better, highly customized exercise regardless of past exercise rules we were all taught.  

In writing this series I hope to evoke ideas on how to tailor the rowing exercise to meet the needs of the individual, and to fill in the intentional or unintentional gaps of their training process.  We will not be covering bioenergetics, energy system development, or programing.  Our primary focus is understanding the wide variety of exercises known as “rows,” and other progressions that you can create on demand.  When a high level of structure, force, and client understanding is reached, your exercise options are only limited by your imagination.

WHAT DO WE WANT TO TRANSFER?

Most training ideologies refer to the performance of specific exercises because they believe that the exercise transfers to the skill an athlete is perfecting to refine their sport.  We are turning that idea on its side today and not thinking about exercise transfer, but the transfer of effects from the exercise that is of primary importance.  

When I say “row”, what pops into your head?  What type of machine or implement do you think of, or are you in crew and think of an erg?  How do you perform that row, and why do you call it what you named it?  I imagine that it is much easier to call the exercise a type of row than name all of its parts as they occur in a specific order, that would be a nightmare.  It would go something like, “Go ahead and do one of those standing, spinal muscles stable with the hip flexed at 90 degrees, scapular retraction, glenohumeral extension, concomitantly with elbow flexion, followed by concomitant elbow extension with glenohumeral flexion, and scapular protraction.”  What a mess.  With that description of shoulder, elbow, scapular, hip, and spinal positions I am sure that you all have an idea in your head of what your “row” would look like. Unfortunately without being more specific, we are not holding into account key variables.  Why aren’t we more specific with the paths of motion, and the specific angles that we choose?  Why aren’t we taking into account at what level we are supported and at what segments we are restrained?  More importantly, why are we not listing the stuff that is not supposed to move during the chosen movement?  In some cases, this can be even more important to the stuff that is moving.

Newton’s third law of reaction is commonly stated, “For every action there is an equal and opposite reaction”(Norkin & Levangie, 1992, pg 15-16).

“You can only shove on something as hard as it shoves on you”(Purvis, 2013, Exercise mechanics lecture).

Restraint (Purvis, 2013, p 8:3)

  1. Support (Purvis, 2013, p 8:3)
  • Types/surfaces- The higher the degree of freedom reduces output capacity
  • Levels – the number of joints involved
  1. Guidance (Purvis, 2013, p 8:3)
  • Any passively restraining influence to the path of motion and is in addition to the moveable resistance.

Think of support as a wide variety of options that you can choose for your client/athlete to completely change the challenge of the exercise, without changing the direction of the resistance or body position.  It can be thought of as using a stable surface to shove off of, whether it is standing, sitting or lying on the ground.  Don’t forget an important factor in Newtonian Physics, the lighter object moves and the heavier object does not.  You need to be able to shove in order to come up with enough force to overcome the force of the implement.

  1. Support (Types/Surfaces)- If there is a high degree of freedom, there is a limited capacity to produce force.  If there is a low degree of freedom, the environment for output expression can increase dramatically.

If the goal is not to generate the highest force possible, but instead to challenge maintaining an alternative position or changing positions during a row, then understand that the maximal output to perform that lift will not be as great.  That is not a bad thing, just a different exercise with a different challenge.

  1. Support (Levels)- The more body segments/joints that need to be controlled/stabilized, the less overall output can be expressed.

Again, this is neither all good nor all bad.  Progressing from supporting body just distal to joints targeted to specifically generate output, to gradually working on stabilizing or controlling multiple body segments in multiple directions and reducing output to focus on body orchestrated control may be a goal.  Both approaches have their place in the grand scheme of athlete/client development.  

  1. Guidance – In the use of a machine, the path of motion may be defined but you are not limited to shoving/pulling through it.(Purvis, 2013, p 12:4-5)

Machine based rowing exercise gives you a variety of experiences that you will not get with the use of free weights, cables, or elastomers(bands).  If the machine path of motion is restrained, you get the choice of either directly opposing that path of motion, or choosing an alternate path slightly off of that path in order to change the challenge of exercise entirely (example: attempting to “pull apart” the handles of a fixed row machine that has handles  traveling sagittally).  If you are using dumbbells, bands, or cables you are subjected to the path of acceleration of the implement depending on its magnitude.

TWO EXAMPLES:

  1. THE DUMBBELL STANDING ROW AT 90 DEG. OF HIP FLEXION VS. DUMBBELL CHEST SUPPORTED ROW:

http://youtu.be/y_yvZcoEVcw

In this scenario we did not discuss the ideas of strength profiles and matching magnitude profiles to create optimal resistance profiles.  This will be touched upon in a later article.

  1. The XPLOAD LOW ROW UNSUPPORTED VS. SUPPORTED


http://youtu.be/QdMW5gPNDFw

Remember, we are only attempting to show the difference in supporting body segments and the ability to generate greater output.  This does not mean that this is the “best exercise,” only a way to increase the output if your goal is to generate more force.

The possibilities of expansion of your exercise options are truly limitless.  How many ways can you choose to experiment with supporting or not supporting the body as the force applied to the body runs with some of its direction anterior to posterior with the point of contact being distal to the glenohumeral joint?  You now have some ideas to experiment with to fill training gaps.  Then, if you choose to experiment with exercises through the force/velocity continuum,  and the endurance capacities of each of those specific biomotor abilities, you can add valuable tools to your tool belt.

  1. Norkin, C. C.,  & Levangie, P. K., (1992). Joint structure and function: A comprehensive analysis 2nd edition, pg 15-16. Salem, MA.
  1. Purvis, T., (2013). RTS manual for the sciences of resistance exercise: Resistance mechanics, pg 12:3-6, 8:3-5. Oklahoma City, OK.


T. Purvis (2013). RTS resistance mechanics

, Retrieved from Body Activation course audio database.

6-WEEK MASS HYPERTROPHY UNDULATING

6-WEEK MASS HYPERTROPHY UNDULATING

10-6-15
Pete Bommarito, MS, CSCS, USAW, MATCS
Owner/President, Bommarito Performance Systems
Owner/President, Bommarito University

Maximizing muscle growth is obviously an extremely important concept for all different types of athletes and fitness enthusiasts. There is tons of data and research that shows different types of programs, and the hormonal response associated with each. The key is to implement the research into application – but with programs that can be safely and intelligently performed that gets the desired results without running the risk of overuse injuries. Separating a person’s goals into 2 main categories is important – the general population and athletes. The benefit of this undulating program is it can be performed and be extremely beneficial to all types of general population and all athletes at various levels.

As always the exercises in this program can be referenced in the BPSU Exercise Database. Make sure you give us feedback and questions in our Forum as you go through this program!

General Population
In the general population not necessarily focusing on an athletic event, it can be purely health related and for aesthetic purposes. Maximizing hypertrophy can lead to a number of health benefits – including but not limited to joint health, structural alignment, bone health, and accelerating fat loss for overall better function.

In terms of aesthetic purposes, males typically want to build as much muscle as possible with being as lean as possible. This program will help to accomplish both. The hormonal response for males is much greater than females, so a male can expect an overall muscle growth that is greater. Keep in mind that even if a male’s ultimate goal is to get “as lean as possible without getting bigger”, this program will still work. The more muscle mass, the higher the metabolic function, which will lead to overall fat loss to be accelerated. Keeping with this same hormonal concept, women should definitely NOT be scared off from an intensive program such as this. For a woman to maximize their genetic potential for muscle growth, doesn’t necessarily mean that they will “get bigger”. The “toning and definition” that I hear women talk about when discussing overall goals of a fitness program WILL BE accomplished with this type of program. Remember that a women’s overall hormonal response is just different than males. Meaning an intensive hypertrophy program will stimulate muscle growth so the muscle can actually be seen more prominently – hence, the “toning and definition” they crave. Couple this concept with the increase in metabolism and thus accelerating fat loss – and women can definitely accomplish their goals – mainly maintain weight but lose fat and gain the toning; OR even lose weight but still have that lean and defined look.

Athletes
The other positive about an intensive program such as this is that it can be used for all athletes, without compromising their overall goals of being explosive. Even an athlete such as a body builder, model, or fitness competitor can benefit tremendously with this type of an undulating model. Many times if an athlete like a body builder is trying to build as much muscle as possible, they get locked into high volume, longer tempos (speed of repetition), and short rest periods. Which is fine, because that is what the research tends to dictate. However, there is nothing wrong with occasionally shifting towards to neural component of maximum effort work and maximizing motor unit recruitment. In a sense, “getting stronger” from implementation of max effort work into a microcycle like this, will allow for greater loads to be placed on the actual “volume days”. If the volume days can be accomplished with these great loads because the athlete is actually stronger, the hormonal response can be elevated with these days – hence more muscle growth.

For traditional sport athletes, this undulating model is a phenomenal method to maximize size and strength, without compromising speed and power. The old way of thinking of “if you train slow you will be slow” can be interpreted in many ways. Hitting an aggressive 6-week microcycle like this to elicit as much muscle growth as possible will definitely not compromise the overall expression of power – especially when you think about how many other microcycles can be placed into an off-season that focuses on power and power endurance. Shifting the focus onto muscle growth for a short 6-week microcycle can really set a great base of size and various types of strength and strength endurance. This base can lead to more efficiency when the focus shifts over to a microcycle that focuses more on maximizing power. This is especially true when you consider the undulating model – note that there is still dynamic and explosive work strategically placed throughout the cycle.

Recovery
This could be the most important factor in the overall success of this model. Note that there are recovery days and off days placed into the workout. Because of the extreme time-under-tension on some of the heavy volume days, recovery is extremely important to allow the muscles AND the nervous system to adequately recover. This single biggest mistake made when attempting a cycle focusing on hypertrophy is that recovery days are limited or eliminated.

Recovery days doesn’t mean that the training stops, or lighter loads/intensities are even implemented. It’s just more of a focus on single joint work, lower overall volume, and controlled, focused tempos. This is necessary not only to allow recovery – but also (and probably more importantly) to keep the structural balance of each joint. This structural integrity will actually allow for more success during the heavier or higher volume days focusing on multi-joint lifts. Think of it in these terms: A multi-joint press will involve elbow extension. A multi-joint pull will involve elbow flexion. A multi-joint squat or single leg squat will involve knee extension and hip extension. It’s always beneficial to ensure that the individual segments are a strong as possible to allow for more overall efficiency (and less compensation for weaker segments).

Undulating Methodology
The overall model of “undulating” is really dominating the research. Meaning that each week doesn’t have a particular focus – each day of each week consistently switches the focus. This allows for an efficient rotating shift between neural (max effort), cellular (volume), combination (more time under tension with maximal weights), and recovery (segmental strength). Even “dynamic” or power based themes are placed into the rotation.

The research consistently dictates that in order to optimize the neural recruitment on a max effort day, hitting this type of workout every 10 days is necessary. Research also dictates that a high time-under-tension (longer, slower repetitions) coupled with shorter rest periods will optimize the hormonal response for muscle growth. Note that some days, a particular muscle group is the focus with this exact concept implemented – this is greatly exemplified in weeks 2 and 4. Some days, a complex (or superset) is implemented – usually in the form of a variation of GVT (or “German Volume Training”) model. These GVT days can be with volume (example week 1, day 1); max effort work with higher tempos (example week 3, day 5; or week 6, day 1); or even complexing single joint and multi-joint lifts for overall volume (example week 2, days 3 and 6). This type of consistent rotation of cellular (volume) and neural (strength) components will help maximize ALL expressions of hormonal response – which can allow for greater recovery, but ALSO greater overall muscle stimulus

Workouts
As with all BPS programs, the when writing with a “1” immediately followed by a “2”, this is an immediate complex (or superset). Taking week 1, day 1 as an example:

The “1” exercise Bench/Board Press with a 40X tempo with 10×10 volume. The “2” exercise below it is Pullups – WAG (wide angled grip) – also with a 40X tempo and 10×10 volume. Note there is not RI (rest interval) for the Bench/Board Press, but there is a 60 second rest interval for the Pullups. This means that a set of 10 (40X tempo) of Bench/Board Press will be performed; then IMMEDIATELY perform the Pullups (40X tempo) for a set of 10. Then rest 60 seconds. Then repeat that exact sequence for 10 total sets.

The Setup illustrates the overall periodization of the 6-week cycle. Note that each day of each week will have the muscle group focus along with the theme. The Theme of each day is also listed at the top of each day within the actual workout.

Implementation of Speed/Movement Work and/or Cardio Work
Each person is going to respond differently to this aggressive type of loading – so general rule of thumb is to listen to the body, and DON’T push through extreme fatigue and soreness. In terms of other general rules to follow
• Don’t hit any aggressive “application” methods of speed during this cycle (like over-speed or long absolute speed) or high-loading change of direction drills
• Focus more on technical aspects, linear acceleration, and multi-directional runs (not changing directions)
• Perform High Intensity Interval Training type of cardio on upper body days
• Perform Long Slow Distance type of cardio on lower body days
• Definitely do not do any type of boxing or grappling type of conditioning on the upper body days that is max effort, or extreme volume

FOREARM AND GRIP WORK – STRENGTH, POWER, AND ENDURANCE – THE UNDERRATED ASPECT OF THE OVERALL PROGRAM

Maximizing various aspects of strength in the forearms, wrists, hands, and fingers is one of the most underrated aspects of many Sports Performance programs.  Even though these muscles involved are smaller muscles (and in many cases, stabilizing muscles), he various aspects of strength of the traditional bigger/stronger muscle groups of the body is similar.  Absolute strength, high-speed eccentric loading, isometric strength, reversal strength, speed strength, and various forms of strength/power endurance are usually the primary categories that need to be considered with any forms of resistance training.  Implementation of absolute strength and isometric strength are a standard in most programs.  However, the other strength components definitely need to be planned for – especially combat style sports like wrestling, football, hockey, grappling, and many aspects of martial arts.  It’s also extremely important with any sports that involve grip on an external surface – baseball bat, tennis racket, lacrosse stick, hockey stick, etc.

Absolute Strength

It is fairly simple to construct an exercise database from an absolute strength standpoint, as many of these are fairly standard in the industry:

  • Elbow Flexors
    • DB Hammer Curl
    • DB Incline Curl
    • DB Concentration Curl
    • Preacher Curl
  • Wrist (bar, plate, DB, Bat)
    • Wrist Flexion
    • Wrist Extension
    • Wrist Pronation/Supination
    • Wrist Lateral Deviation

One overlooked aspect of absolute strengthening is the hands/fingers:

  • Finger to Wrist Flexion – letting the bar roll out onto the fingers, initiating finger flexion to finish into a wrist flexion
  • Bat Finger Lateral Deviation – simply grasping a light object (such as a baseball bat) between the right and left index fingers and moving the bat up/down slowly to gain lateral deviation
  • Hand Gripper
  • Finger Gripper

Isometric Strength

Plate holds and Farmer Walks are the simplest way to gain isometric grip strength.  However, implementation of these unorthodox isometric exercises can be great variations to really overload this concept:

  • Towel Holds
  • Fat Bar / Fat Handle DB Curls
  • Landmine Bar Holds (outside)
  • Landmine Bar Holds (across)
  • Sorinex Mighty Mitt Rack Ball Holds
  • Sorinex Might Mitt Rack Ball Pullups

High Speed Eccentric Loading / Reversal Strength

As seen in the BPS “Exercise of the Week” from July of 2015 (and the subsequent loading onto the Exercise Database), the Landmine can be a powerful tool for Grip Strength, especially from this unique strength category:

  • Dynamic Eccentric Load
    • Bar Toss Pause (high)
    • Bar Toss Pause (low)
    • Bar Drop Pause (outside)
    • Bar Drop Pause (across)
    • Variations of Toss/Drop with KB
  • Reversal Strength
    • Bar Toss Reflex (high)
    • Bar Toss Reflex (low)
    • Bar Drop Reflex (outside)
    • Bar Drop Reflex (across)
    • Variations of Toss/Drop with KB

Kettlebells can also provide an effective alternative:

  • KB Hammer Curl Toss/Catch (pause)
  • KB Hammer Curl Toss/Catch (reflex)

When moving into the concept of strength endurance and power endurance, grip work can definitely be programmed for, and have a huge transfer to many sports.  This can be a huge advantage when training for combat style sports.  For example, it’s obviously important for a wrestler to have a “strong grip”, but it’s equally important to be able to maintain a level of grip strength over a period of time (since a level of grip strength must be maintained for an extended length of time; like a period within the match.  Taking a simple exercise like strengthening wrist flexion/extension for sets/reps; and converting it into a strength endurance exercise like Wrist Rollups for a period of time.

Strength Endurance:

  • Timed Wrist Rollups/Rolldowns
  • Timed Band Wrist Flexion/Extension
  • Keiser Cable Curls (looking at maintaining percentage of peak power output over a length of time)

Power Endurance (Dynamic Eccentrics and Reversal are sub-components).  Lighten the load, and go for time instead of maximal strength with sets/reps:

  • Timed Landmine Bar or KB Drops
  • Timed Landmine Bar KB Toss
  • Timed Band Switches

An overall periodization model for “combat sports” for supplemental grip work to add in addition to the traditional resistance training program could be as follows:

Weeks 1-2

Day 1 – Absolute Strength focus (note the eccentric focus):

  • DB Hammer Curl (311 tempo) 3×10
  • Wrist Flexion/Extension (211) 2x10e

Day 2 – Isometric focus:

  • Towel Holds (elbow 90deg) 3x30s
  • Farmer Walks (bumper plates) 2x20yd

Day 3 – Combo

  • Mighty Mitt Ball Pullups (311) 4×10
  • Bat Finger Lat. Deviation (111) 2×10 each finger

Weeks 3-4

Day 1 – Absolute Strength

  • KB Hammer Curl Toss (X1X) 4x10e
  • Bat Wrist Pro/Sup (111) 3x10ee

Day 2 – Dynamic Eccentric to Isometric

  • LM Bar Toss Pause (X1X) 3x15e
  • LM Bar Drop Pause (X1X) 3x15e

Day 3 – Combo

  • Hand/Finger Gripper (232) 3x10e
  • LM Bar Holds 3x30s

Weeks 5-6

Day 1 – Absolute Strength

  • Bat Wrist Lateral Deviation (131) 2x10ee
  • Fat Bar Curl (101) 4×8

Day 2 – Reversal Strength Endurance

  • LM Bar Toss – Reflex (XXX) 3x30s
  • KB Drops – Reflex (XXX) 3x30s
  • Timed Band Switches (XXX) 3x30s

Day 3 – Combo/Endurance

  • Mighty Mitt Holds (elbow 90deg) 3x30s
  • Band Wrist Flex/Extend 3x30s e
  • Wrist Rollup 3x30s

BASE OF STREGNTH FOR THE TRUNK AND SPINE REGION

This is obviously a highly controversial and well-discussed topic in the Medical and Sports Performance industry.  Many people refer to it as “core training” or “abdominal training.”  It is probably more appropriate to refer to strengthening muscles in the trunk simply as “trunk strengthening.”  With the trunk simply being defined the region between the pelvis and the rib cage; which can encompass some of the muscles that attach to the pelvis, rib cage and/or spinal columns in that region.  Now there are exceptions – obviously muscles that attach higher than the rib cage that will cause motion in this defined “trunk” region.  For simplicity purposes, this aforementioned definition of trunk can be used as a standard.  There are so many variations of what “core” can actually mean, that many times it’s not as specific as strengthening the motions in the trunk.  For example, many muscles will attach to the pelvis, but not the rib cage or spine.  These play an important role in stabilizing the pelvis during trunk motion; but not be active trunk movers.  Those muscles could be considered into what is commonly referred to as core training.  So for definition purposes, core training is more global, while trunk development is more specific to strengthening the motions of the specific region.  The motions of the trunk can be simply categorized as flexion, extension, rotation, and lateral flexion (or side bending).

It is definitely important to know each of the individual muscles, the attachment sites, and the integrated function of each.  Having a full understanding of anatomical functions (specifically how it relates to muscles that attach to the pelvis, rib cage, and spine) is an essential part of being a true professional as a medical and/or performance professional.  However, this is not an article to dazzle advanced science on anatomy, biomechanics, and joint forces.  This is intended to simplify the understanding of the motions of this loosely defined trunk area, and exercises that assist with the strengthening and development of this area.  Like anything in the industry, there is advanced scientific basis – and intelligent application methods that is easy to implement with the clients.  This is definitely a key point – many times there is a ton of advanced scientific literature without any good follow up of implantation strategies.  Other times there is a mass of exercises in a database based on what “feels the burn in the abdominals” without any real scientific basis on whether or not it’s appropriate.  Many times, the best way to approach applied science is to simplify concepts – and the exercises can be advanced over time as the practitioner gains more anatomy and biomechanics education.  And that can be an issue.  Contrary to what many believe, there is nothing wrong with a trainer with limited anatomical knowledge to implement basic strategies – as long as he/she is committed to advanced education, and implementing advanced strategies as the education reaches a level that is appropriate for these advanced strategies.

ISOMETRIC VERSUS CONCENTRIC/ECCENTRIC ACTION

This is going to be a key point that is referenced to constantly.  It’s absolutely crucial to get isometric focus when combining trunk motions.  It’s obvious the combining motions will occur in sport.  However, that doesn’t make it necessarily appropriate to attempt to “re-create” the motions in training.  What can be appropriate is simultaneously developing the combination of motions, with one focus being on the concentric/eccentric action, and the other motion being developed isometrically.  It’s always important to remember that we are Performance Coaches – our job is to develop the muscles by improving the contraction and raising the threshold.  The muscles developed will then be able to withstand the forces that occur during sport – thus raising the performance and minimizing injury.  This concept is exemplified in the following examples, which is demonstrated in the BPS University Exercise Database:

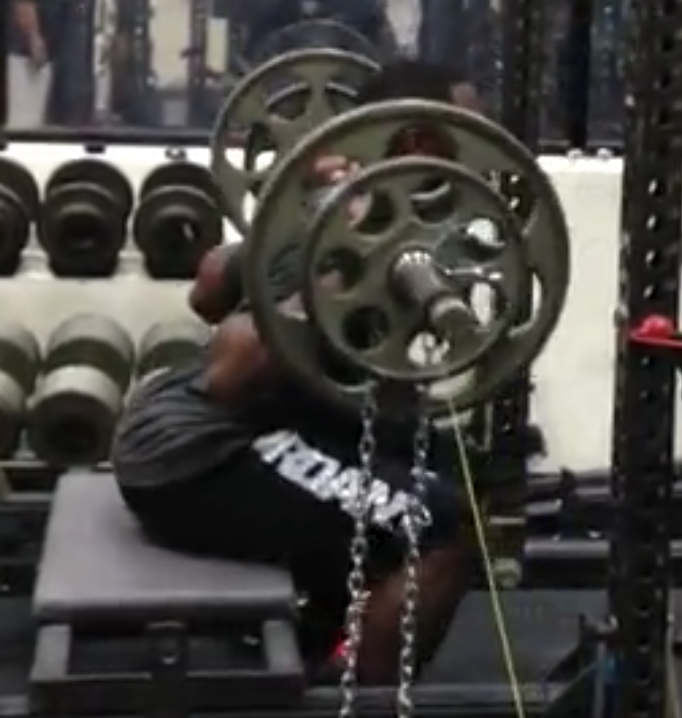
1. Basic Crunch versus Single Sided Weight Crunch

Basic Crunch – goal of this exercise is trunk flexion.  Forget the whole “draw in versus the abdominal brace” argument.  It’s been argued to death.  Think in basic terms – the trunk MUST flex, so the cue is to bring the rib cage towards the pelvis (use ASIS as a landmark if necessary).  One of the best cues?  Basic Crunch – Resisted.  Both are in the BPSU database.  Note that the cue is to push into the manual resistance, which will force the rib cage towards the hips, creating basic trunk flexion.

Single Sided Weight Crunch – goal of this exercise is combining trunk flexion with trunk rotation.  Note that the trunk flexion is the exact same as the Basic Crunch – creating the same concentric/eccentric action.  With the weight on one side of the body, the Trunk Rotators are working isometrically.  The cue is to have the exact same Basic Crunch action, with the shoulder blades leaving the ground simultaneously, and coming back to the ground simultaneously.  If the weight is on the right side – when the trunk starts to go into flexion, the weight is “trying to pull” the trunk into right rotation.   If the trunk flexes WITHOUT rotation to the right however, the left side trunk rotators are being developed isometrically during the action.

Considerations of these exercises as an appropriate alternative

This sequence can be much more appropriate than a “Rotational Crunch” where there is a combination of flexion and rotation from a concentric/eccentric action in both motions.  Understanding the anatomy of the spinal columns in this region, this might not be appropriate in many cases due to the structure of the facet joints. 

Note that on BPSU, this concept is shown with many variations of hip flexion angles. Trunk flexion and combination of trunk flexion / trunk rotation needs to be developed at various hip flexion angles, in a supported (feet on ground), and unsupported (foot or feet off ground). 

2. Supine Hip Bridge versus Supine Hip Bridge (Side Band)

Supine Hip Bridge – goal of this exercise is hip extension and trunk extension.  While the primary action is hip extension, there is subtle trunk extension involved in this action – from a concentric/eccentric action and isometric action.  Note on the BPSU Exercise Database, there are many variations of leg position, and additional variations of isometric dorsiflexion or plantarflexion.  All of it is important, as the varying leg positions will put a different emphasis and challenge across the pelvis during the action.

Supine Hip Bridge (Side Band) – goal of this exercise is combining hip/trunk extension with trunk lateral flexion.  Note that the hip/trunk extension is the exact same as the Supine Hip Bridge – creating the same concentric/eccentric action.  With band pulling to one side, the trunk lateral flexors (side benders) are being developed isometrically.  If the band is around the left hip with the force being pulled to the right, the band resistance is “trying to pull” the trunk into left side lateral flexion.  If the exercise repetition is completed WITHOUT lateral flexion to the left, the right side trunk lateral flexors are being developed isometrically.

Considerations of these exercises as an appropriate alternative

This is the same concept as shown in the previous example of flexion and rotation.  It may not be appropriate to work the lateral flexors in a concentric/eccentric action (especially with combining other trunk motions) because of the anatomical structure of the spinal columns in that region – to limit inappropriate stress on the facet joints. 

3. Pushup Series Leg Extension versus Pushup Series Leg Extension Fan

Pushup Series Leg Extension – goal of this exercise is trunk flexion and rotation, with hip extension.  In the pushup position, the hands and feet are obviously on the ground.  Gravity is “trying to pull” the trunk into extension.  If the pushup position is held WITHOUT trunk extension, the trunk flexors are working isometrically.  When the right leg leaves the ground for concentric hip extension, gravity is now “trying to pull” the pelvis to the left (which is turn is “trying to pull” into right side trunk rotation).  If the hip extension occurs WITHOUT rotating the trunk to the right, the left side trunk rotators are now developing isometrically. 

Pushup Series Leg Extension Fan – goal of this exercise is combining trunk flexion, trunk rotation, hip extension, and trunk lateral flexion.  Note that the exercise is the exact same as the Pushup Position Leg Extension.  The main difference is at the top of the hip extension, the leg is “fanned out” (hip abduction), then returned to the original position (hip adduction), and then returned to the ground.  Using the right leg action example again – when the leg is “fanned out”, the force is “trying to pull” the trunk into right side lateral flexion.  If the exercise repetition is completed WITHOUT right side lateral flexion, the left side lateral flexors are developing isometrically. 

Considerations of these exercises as an appropriate alternative

This entire sequence is really a phenomenal example of training the entire system.  This exercise sequence is a great way to combine 3 different trunk motions simultaneously in a safe and highly effective manner.  Take the examples of a baseball pitcher throwing a baseball, a volleyball player spiking a ball, or a tennis player serving.  A case can be made that all of these actions involves some type of combination of trunk flexion/rotation/lateral flexion.  While it might not be appropriate to “recreate the action” of this exact sport motion during training – safely and effectively training the muscles that are involved in the action is very appropriate.

Putting the Plan into Action

When focusing on the trunk strengthening, there can be three primary categories:

  • Basic strength – as demonstrated in this article, and referenced in the BPSU Exercise Database
  • Isometric development – pillar bridges, planks, and isometric band work (demonstrated repeatedly in the BPSU Webinar on Overhead Throwing Athlete)
  • Integrated function – Sled march series (BPSU Exercise of the Week), Keiser and Band Power Endurance Series (BPSU Webinar) and Various Landmine Exercises

A progressive overload is necessary to developing the trunk, just like with any other type of resistance training.  The following plan can be a great example of how to intensify exercises and increase the specificity once the base foundation of strength and stability is achieved. 

Early in the macrocycle:

Day 1 – Pillar Isometrics

  • 2×30 sec each

Day 2 – Basic Strength (232 tempo)

  • Trunk Flexion exercise 2×8
  • Trunk Flexion/Rotation exercise 2x8e 
  • Trunk Extension exercise 2×8

Day 3 – Band Isometrics (Seated)

  • 2×30 sec each

Day 4 – Integrated Function Band Power Endurance (212 tempo)

  • 2-3 exercises; 10 reps each side

Middle of the macrocycle:

Day 1 – Basic Strength (212 tempo) – add weight where applicable

  • Trunk Flexion (unsupported hip angles) 2x12e
  • Trunk Flexion/Rotation exercise (unsupported hip angles) 2x12ee
  • Trunk Extension/Lateral Flexion exercise 2x12e

Day 2 – Band Isometrics (Kneeling Aligned) or Weighted Pillars

  • 2×30 sec each

Day 3 – Basic Strength (101 tempo)

  • Trunk Flexion (weight) 2×15-20
  • Trunk Rotation exercise (unsupported hip angles) 2x8e
  • Trunk Extension/Lateral Flexion exercise 2x15e

Day 4 – Integrated Function Landmine Rotation Series (101 tempo)

  • Linear Rotation 2x5ee
  • Lateral Rotation 2x12e
  • Reverse Rotation 2x8e

End of the macrocycle:

Day 1 – Basic Strength (311 tempo) – add weight where applicable

  • Trunk Flexion/Rotation 2x8e
  • Lateral Flexion 2x12e
  • Trunk Flexion/Rotation/Lateral Flexion 2x10ee

Day 2 – Integrated Function – Keiser/Band Power Endurance (XXX tempo)

  • 2-3 exercises; 15 reps each side

Day 3 – Band Isometrics (Kneeling Align, Unsupported)

  • 2×20 sec each align, each direction (8 total)

Day 4 – Integrated Function – MB Power or Landmine Bar Toss/Drop Series

  • 2-3 exercises; 6-10 reps each side

Row Isometric Wave

There are a vast amount of row exercises and many variations for each. A staple in our BPS system is the isometric wave row. Typically, we utilize the seated row or incline prone row apparatus. The tempo for these row exercises begins at 6-1. This means the athlete concentrically rows, and then isometrically holds at the controllable end range of motion for 6 seconds. Once the hold time is complete the athlete will perform two controlled 101 tempo reps and isometrically hold again on the second rep. This time the hold decreases to only 5 seconds. Repeat this process until the last one-second hold is complete followed by the last two reps that will finish the set.
Once a foundation of rowing strength is set this tempo can be progressed by increasing the time under tension with longer isometric holds. For example, we would keep our athletes on the same weight as used for the 6-1 tempo but increase the tempo to 8-1, 10-1 or even 12-1. This progression will quickly increase the isometric strength of the back and posterior chain. The posterior chain in this case may include the trapezius, rear deltoids, erector spinae, rhomboids, etc. Any given athlete can progress up in tempo by two seconds about every three weeks. On upper body days, keep the wave tempo to about 4 sets of rows depending on the athletes needs.
All athletes require a strong posterior chain for many reasons including sprinting arm action speed, proper posture, shoulder health and reversal strength involved in all pressing motions. To obtain row strength through the use of the wave tempo in all planes of rowing motions, you’ll need to utilize multiple variations of rowing exercises. For instance, you can apply the 6-1 wave tempo to the
 DB incline row (narrow or wide grip)
 Inverted row (varying the grip)
 DB or band shoulder (rear, front, side)
 Pull-ups (varying the grip)

**Tips for row performance: When performing all rowing exercises its important to focus all your intention on retracting the scapulae first. Follow scapulae retraction with horizontally abducting the humerous to its controllable end range of motion. At this end range of motion, execute the chosen isometric contraction time (i.e. 10-1) and visualize all the muscles in the back contracting. The arm flexors will assist with most rowing motions but try to skew your intention to the musculature of the back.

PULLUPS – START ASKING THE RIGHT QUESTIONS WHEN IT COMES TO EFFECTIVENESS, APPROPRIATENESS, AND LOADING PATTERNS

There’s no question that the Pullups is the one of the most effective upper body “posterior chain” or pulling exercises. It puts a great deal of emphasis on the latissimus dorsi (lats), essentially working very large muscle groups. It’s also extremely effective because of the unique pulling range requires so many muscles to be active. So it’s commonly referred to as an exercise that “gives a lot of bang for the buck”. It’s always good practice to implement exercises that accomplishes so much in a given set volume for the day. In addition, with the load being so significant, the high stress on the CNS in terms of recruitment is a huge benefit.

However, even though it’s fairly agreed upon throughout the industry that the Pullup is very beneficial in certain respects, it’s still become a focal point of extreme controversy. Most of the controversy seems to be centered around: Pullups being effective at all versus being detrimental to the shoulder joint; Banded Pullups versus body weight Pullups versus weighted pullups; and various types of grip relating to the various levels of efficiency.

The problem with the “controversies” is that people keep asking the wrong questions and focusing on aspects that are secondary to the PRIMARY issues. The primary issues with regards to the Pullup that needs to be addressed before anything else:

1. What is the Active Range of Motion (AROM) of both “shoulder joints” in various positions
First, a simplistic breakdown of the joints:
• Glenohumeral (GH) Joint – commonly referred to as the shoulder joint
• Scapulothoracic (ST) motion – commonly referred to as the scapular joint
A ton of scientific detail could be introduced here about scapulo-humeral rhythm (the interplay of of the GH, ST, Acromioclavicular Joint and Sternoclavicular Joints) or the Scapulohumeral ratio (ratio of the GH movement to the ST movement during arm elevation with the commonly used 2:1 ratio). However, instead of getting into too much detail and various discussions/arguments about ratios – just think in simple terms of the how it RELATES TO the Pullup. At the bottom of the Pullup, your body weight pulling down will force your shoulder joint into extreme levels of flexion/adduction (and upward rotation of the scapula keeping with the SH ratio). The key question to think about is: Can you even control these extreme ranges of motion WITHOUT the extreme load of the body forcing it?

A simple test would be to have your client lay supine and just test the range. The client starts on his/her back with the arms at the sides and the coach moves the arm up into flexion (with the client also contributing to the motion, so it’s a combination of passive/active). Identify two main aspects:
• What is the total range that can be controlled in this unloaded motion
• Is there an asymmetry between the right and left arms

Perform the same test while the client is standing up and see if there are changes; also watch the differences between the scapula.

You could also get more detailed by performing the test in an “overhand” position, “neutral grip” position, or “underhand” position – hence varying the levels of internal or external rotation at the shoulder joint that would be present during the 3 grips of Pullups.

There is obviously MANY extensive and individualized assessments that can be used to provide data that is more specific. However, this basic AROM assessment is for trainers to use quickly in the middle of sessions to identify two main factors:
• Is the Pullup appropriate at this time for this client
• If so, what is the controllable range that is appropriate for this client at this time when performing the Pullup

2. What is the ultimate goal of the exercise at this point in the training cycle
This is the most basic of primary issues, but it’s also still very important. Just think in simple terms, what exactly are you trying to accomplish?
• Size
• Strength
• Total volume
• Tempo of lift
• Athleticism
• Shoulder joint health
In breaking down your ultimate GOAL, always attempt to identify if there is a more suitable exercise that does the same MOTIONS as the exercise you wish to assign, but might be more appropriate. Reasons for a possible adjusting/substitution of the exercise:
• Limits in AROM assessment that won’t align with the required range for the Pullup
• Issue with previous injury to the shoulder (even if client doesn’t “feel pain” at that moment)
• Your inexperience with anatomy/planes of motion of this complex lift versus an accurate AROM

3. What is the injury history of the shoulder complex
The main thing to think about with regards to injury is whether assessing/treating/assigning restrictions on an exercise exceeds your education, experience, and/or certification and/or medical license. Or, even if it falls into your “job description”, do you have the proper time to spend to perform a necessary evaluation?

The bottom line is that the Pullup is a very complex exercise with many joint motions involved when compared to other upper pulling exercises. The more of these types of independent variables, the more factors you have to consider when assigning it. If there is a previous injury history, ensure that it gets checked out by the proper medical professional. If they clear that type of “range” required for a Pullup, implement it. If not, change the exercise to still accomplish your GOAL, just do it in a manner that won’t put additional wear on a joint that has already been compromised.

4. What is the actual joint motions involved during the Pullup
Main actions at the shoulder:
• Adduction
• Extension
• Horizontal abduction
Main actions at the scapula
• Retraction
• Downward rotation
• Depression
Main actions at the elbow
• Flexion
Possible actions at the spine
• Extension

Keep in mind that the purpose of this article is NOT a full anatomy review. Of course there could be additional motions involved during an exercise as complex as the Pullup; especially with all of the variations to the Pullup. It’s essential to learn and understand these MAIN actions for a simple breakdown to answer one question:

If the AROM and/or INJURY HISTORY causes a trainer/client/athlete to analyze the true GOAL of the Pullup and possibly make a choice to modify/substitute – what modifications/substitutions needs to be made?

ANY “controversy” in the industry about Pullups can always lead back to one or more of these 4 main aspects. Examples of many of the things I’ve heard, or has been argued to death in literature:

Should pullups be band assisted, body weight, or weighted?
Probably the most “argued” point in literature and definitely the most pointless and ridiculous. Easiest answer to this question is to look at 1 and 3 above. If the injury history and AROM dictates that the range of flexion/abduction is less that what will be forced by the body weight (and, of course, any weight added to body weight) at the bottom of the Pullup, then use a band. The reasons are not necessarily for assistance. The band will allow the feet to angled forward so the body “leans back” at the bottom of the range – which will limit the amount of range of motion of flexion and could fall into what you have identified as a “controllable” range. Hence making the lift appropriate at this time.
Here’s the common themes argued in literature:
“The band assisted exercise won’t get as much CNS work and motor unit recruitment.”
“The band assisted won’t increase as much size/strength.”

And, here’s the answers:
Add more volume, increase the tempo, or just add weight! Nothing wrong with using a band to adjust the position, then adding weight for additional load. Don’t’ think in terms of absolutes of what is “better.” Think in terms of what is better for this client at this time.

Is the Pullup effective or detrimental?
Again, look at 1 and 3 above. They either check out or they don’t. If they check out, it’s effective. If not, it’s detrimental. If your goal (look at 2 above) fits with the modifications (look at 4 above), then modify it and it can be effective. If modifications in this case aren’t used, it can be detrimental.

As always, don’t think in absolutes. And it’s not just, what is good for a client. It’s more of what is good for the client at this time. Because the development, AROM, response from a previous injury, CNS activation will always change. This has to be constantly assessed.

Is the Pullup the “ultimate” pulling exercise for the upper body?
OF COURSE! It would be hard-pressed to find a more effective exercise for all of the goals outlined in 2 above. However, it becomes extremely ineffective if anything is found in sections 1 and 3 above the makes the Pullup detrimental.

Also, don’t forget about the power of partials on something like a Pullup. AROM assessments can always lead to making the modification of a Pullup to just shorten the range of motion – not change the range of motion like with a band-assisted action.

Here’s the common themes argued in literature:
“Partials won’t get the full “stretch” at the bottom or the full “contraction” at the top and therefore the muscle development won’t be as great as a full ROM Pullup”.

And, here’s the answer:
That is true, but it will be more appropriate! Over time the appropriateness of the Pullup variations/modifications/substitutions will lead to greater muscular development; and possible lead to an appropriate “full ROM” Pullup. Don’t ever sacrifice wear on a joint for “full muscle development”. Also keep in mind that if a range can’t be controlled, the tissue probably isn’t contracting maximally at that range. Is the appearance of a full ROM Pullup actually working the muscles you think it is? Or is the compensation changing things? And/or is the momentum created giving the appearance of the range, but not actually contracting in that range?

Pulldowns can work the “full range” but also modify the joint positions and load to make it appropriate. And then adding partial (body weight or weighted) Pullups can get a LOT of CNS work and extreme muscle development.

As Pullups are shown to be extremely effective, the complexity and independent variables introduces a lot of thought processes that must be considered each time the exercise is planned for in a workout. Never think in “absolutes” – only think in the best scenario for that specific day. Have a full understanding of anatomy and planes of motion to intelligently assign what is appropriate style of Pullup for that particular session.

Bone Growth and Youth Development

12-2-16

Adam Boily MS, MATJS, USAW

Here might be the most commonly asked question a strength & conditioning professional must answer to youth athlete parents.

Question:

“Will my 13 year old child (or younger or teenager) have a stunted growth from lifting weights?”

Answer:

It depends. It depends if the athlete is exercising biomechanically correct or not. Stunted bone growth may occur when the open growth plates located at the ends of bones become damaged. Damaged open growth plates can happen for various reasons, which include an injury from sport or poor exercising technique. For example, if a 12 yo athlete playing soccer sustains a trauma to the knee in a soccer game, he/she could incur growth plate damage around the knee. Another way an athlete can sustain growth plate damage in the knee would be biomechanically incorrect weight-bearing exercises. Say a 10 yo athlete is front squatting and during every repetition their right knee caves in with a valgus moment. If an expert S&C coach is not there coaching the athlete out of these poor mechanics, overtime knee growth plate damage might occur before the plate close. However, most youth athletes will not experience growth plate damage from training or in sport as long as qualified professionals are monitoring exercises.

It’s important to develop youth athletes through sport and training participation because their young bodies and minds are like sponges and we want them to learn exercise technique and proper nutrition before they may learn bad habits. To avoid growth plate damage in young athletes, their training should be focused on light loads (body weight or light weights) so they can learn the intention of each exercise. When an athlete is below the age of 13 yo, they benefit tremendously from learning proper biomechanically correct exercise techniques and become strong through a long amount of isometric exercises. Before weight is increased for the youth athletes, volume and isometric times should be increased substantially so proper technique is reinforced and the athlete naturally performs exercises biomechanically correct. These exercises may include squatting, pressing, pulling, running, and jumping. Typically we find that athletes starting to exercise around 5-8 yo will become strong enough and biomechanically adequate for progressive resistance training when they reach 14 yo. Also, at this point, the growth plates are still open/undamaged and these athletes will start peak height velocity (puberty).

Surges of hormones, including testosterone, are beginning to flow through the athlete naturally. This is the ideal time for athletes to exercise with heavier resistance and advanced plyometrics. With the surge in hormones and advanced strength and conditioning volume combined, the athlete will experience hypertrophy of lean muscles, increased bone density, length, and girth as well as other bodily tissue growing. Sometimes, an athlete will grow rapidly and the muscles become stretch so fast that the brain has a hard time communicating to or controlling the muscles during this growth. In this case the athlete will become clumsy or uncoordinated (you may have this seen this with young basketball players). However, if during this time that same athlete were in a proper training program, especially involving isometric exercises (pillars or infant squats), their muscles would remain strong and would not become as clumsy. During this time of puberty, the athletes’ recovery time will be much more rapid allowing them to endure progressive amounts of volume from day to day and week to week.

To some it all up, participating in unsupervised training or with unqualified coaches could potentially put youth athletes in scenarios that could damage growth plates. Again, few youth athletes experience stunted growth and damaged growth plates and these rare occurrences from improper movements should not detour youth athletes from exercising young. The benefits a youth athlete receives from intelligent training and sport play are far too valuable to be passed up. There are many brilliant minds and a plethora of scientific research that shows bone growth will be improved (sometimes more than genetics had planned) rather than stunted through biomechanically sound youth training. Depriving a youth athlete from proper training before, during and after their peak height velocity is doing that athlete a major disservice and could potentially cause that athlete to never reach their full genetic potential.


*For more information join our BPSU and go research and study the work of Istvan Balyi (an expert in long term athlete development).

UPPER BODY PRESSING STRENGTH – BUILDING ABSOLUTE, SPEED, REVERSAL, AND STABILIZATION STRENGTH COMPONENTS AND SPORT SPECIFICTY CONSIDERATIONS

By Pete Bommarito, MS, CSCS, USAW, MATCS, MAT Jumpstart

6-9-15

For years, the “Bench Press” has been the gold standard for athletes and fitness enthusiasts for total upper body strength.  In today’s era of Sports Performance, various strength components of all forms of upper body pressing remains a highly controversial subject.  There are some that feel that Bench Press strength (and strength endurance) it is still the gold standard for measurements of overall strength of the upper body.  There are some that feel that it is overrated, and prefer to train upper body pressing around what they consider to be more “functional” forms of upper body pressing.  Through all of the online controversy, one important truth remains to be constant – upper body pressing strength, in ALL its forms, is absolutely essential to all sports and levels of athletes.  This article will break down all forms of pressing strength; discuss the various components of how to maximize each form; and discuss all of the arguments in terms of level of importance and sport specificity.


POWERLIFTING “TRANSFER” and “SPORT-SPECIFICITY”

 The constant argument that maximizing absolute strength for the Bench Press should remain in Powerlifting and has little transfer to “Sport-Specificity” of many movements seen in athletic competition is completely ridiculous.  Even the argument that it should remain in heavy contact sports (such as Lineman in football) holds little to no value.  The bottom line is that many elite and well-educated Powerlifters have great knowledge on methods to improve overall Bench Press absolute strength – such as assistance exercises, techniques, variations specific to the body and individual weaknesses, periodization models, etc.  All of these great concepts relates to increasing efficiency, safety, and performance improvements of all forms of upper body pressing.  Yes, they will use is specifically for their event in their sport.  However, that doesn’t diminish the value of the concept of the necessity of upper body pressing strength and efficiency with all levels of athletes at all sports.  When identifying this “importance”, just break down the biomechanics of what is actually occurring during an “upper body press”, whether it be a traditional Bench Press exercise or not.


“What is an upper body press?”

  • GlenoHumeral (GH) Horizontal Adduction 
  • Elbow Extension
  • Scapular and Spinal stabilization


There will be varying degrees of these biomechanical motions.  For example, the amount of GH horizontal adduction between a DB press and a barbell press; or incline versus flat.  Or the increased level of scapular/spinal stabilization needed for a good “arch” in the lumbar/thoracic area via a commonly used Powerlifting technique.  Or the level of stabilization isometric strength required for a SA DB Press, specifically through the trunk/spine rotators.  However, the most important factor is that no matter the variation, the three aforementioned motions will always occur.


“Sport-Specificity? 

In the weight room, the most overrated topic in the entire industry of Sports-Performance.  Never has this “arguement” been more ridiculous than something like than upper body pressing.  Think of these main questions, when questioning whether upper body pressing is “necessary” for your sport:

  • Is there any sport where GH Horizontal Adduction does NOT occur?
  • Is there any sport where elbow extension does not occur?
  • Is there any motion in the weight room that exactly mimics the specificity of the actual motion that occurs in sport
  • THE ANSWER TO BOTH QUESTIONS IS A RESOUNDING NO!

The bottom line is Sports Performance Coaches need to stop trying to mimic what is “specific” to the motion of what exactly is occurring in their sports and start thinking in terms of what biomechanical motions occur during their sport.  Hence, what is known as the BPS mantra:  TRAIN MUSCLES, DO NOT TRY TO RECREATE MOTIONS OF THE SPORT!!


Training the muscles themselves that produce a motion – in all of the forms of strength – in BOTH isolated and complex mutil-joint movements WILL transfer to the sport.  And it will transfer to the motions of the sport.  Muscles create the motions seen in sport.  There are many ways to train and develop these muscles that will enhance these motions seen in sport – without actually recreating the motion!  Hence upper body pressing, which may not recreate ANY motion exactly seen in sport, but greatly enhances strength and efficiency of key motions seen in virtually EVERY sport!

  • Do “throwing” or “overhead” athletes undergo GH Horizontal Adduction and/or Elbow extension during their sport? YES
  • Do “fighters” or “combat” athletes really need to ALWAYS train the “endurance” aspects of upper pressing, or try to make the press specific to a “punch” with bands, cables, air resistance?  NO
    • Is this move into more specificity important? YES, but at later forms of the training cycle
    • Will just simply strengthening and increasing the efficiency of GENERAL FORMS of GH Horizontal Adduction and Elbow Extension lead to greater trainability at the more “specific” forms of training, like more punching motions with bands, cables, with/without strength endurance?  YES
    • Will absolute strengthening of general pressing lead to more efficiency when building eccentric, reversal, and dynamic pressing motions?  YES
    • Is pressing strength, even in general and basic forms “specific” to all athletes at all levels in all sports?  YES!


Just always remember when discussing anything “functional” or “sport-specific” to as the RIGHT QUESTIONS.  And give answers based on proven biomechanics of how the body functions – in training versus sport specific motion.


Keep in mind that general modications can be made for the individual, NOT the sport.  The individualization might arise because of the wear and tear of the sport.  But the variations of pressing strength is always related back to the individual.  The specificity of the sport always relates back to volume.  Not just volume of the overall periodization model, but volume of each of the types of strength seen in the overall periodization model.  For example:  An Offensive Lineman in the NFL will differ from a high school volleyball player with regards to volume.  They both need pressing strength with regards to absolute, speed, reversal, and stabilization strength.  But the overall volume of pressing strength on each workout of the overall periodization model will be different.  And the volume of each of the categories of absolute, speed, reversal, and stabilization strength will be different.  Any modifications (board versus flat, overhand grip versus neutral grip, DB versus barbell) will be related to the individual – NOT the sport.  Individuality is that of injury history, current ability to neurologically contract, ROM limitations (biomechanical or current neurological function), training history, etc.


ABSOLUTE STRENGTH

Absolute pressing strength usually revolves around a 1RM (rep maximum) Bench Press.  The most “sport-specific” form obviously being Powerlifting, since the Bench Press IS the sport (or one of 3 key events in the sport).  As more and more eilte Powerlifters and Powerlifting coaches enter the world of Sports Performance, maximizing Bench Press absolute strength for athletes is becoming more and more prominent.  As demonstrated above, the elite Powerlifting community can be extremely valuable in terms of all forms of upper pressing absolute strength.  In fact, 1/3 of their entire sport revolves around the ability to maximize upper body strength while limiting overload joint stress associated with this motion. All assistance exercises and variations will then lead towards efficiency and minimizing overload stress.  Imagine how important it is for an “overhead” athlete to train GH Horizontal Adduction and Elbow Extension without overload stress on the associated joints!  Can even baseball players learn a great deal from an intelligent Powerlifter that has perfected the art of maximal strength?  Absolutely


One more thing to keep in mind with regards to “specificity” of absolute strength training of upper body pressing is CNS overload.  Overall neural recruitment is essential to maximizing all forms of athleticism.  Upper body pressing strength, even with and especially with limiting range of motion pressing (board/floor press), will definitely require high motor unit recruitment.


In terms of maximizing absolute strength, be careful of not trying to follow rules.  However general guidelines are very important.  Following these simple guidelines can be a great starting point for all athletes, with obvious individualization needed with regards to independent variables listed above (like injury history, etc.).:

  1. Use 4-board, 3-board, 2-board, and 1-board pressing extensively.  Not onl for great variation at a found weakness (“sticking point”), but also for training in ranges they can control.  Many times, even the strongest and most experienced lifters can have a neurological inhibition which can limit range of motion control.  Identifiy the inhibiton and treat it to open up the range, but don’t slow down the absolute strengthening progress – just train in the controllable range of motion at that particular snapshot in time
  2. Use variable load consistently!  Accommodating resistance is well documented and scientifically proven.  Don’t only use it for Dynamic days, it can be a valuable CNS overload on maximum-effort days as well
  3. The less experienced lifters use less variations.  The more experience lifters use more variations.   For our more experienced lifters, we change the variation of the pressing almost weekly.  For less experienced lifters, use the same press for at least a 3-week microcycle to gain experience in the actual skill of the assigned press.  Don’t change the variation just for the sake of changing it.  Always have a reason.
    1. For our middle school and grade school athletes, we change it about every 8 weeks
    2. For our high school and beginning collegiate athletes, we change about every 3 weeks.
    3. For our elite and professional athletes, we change it weekly; unless they are a less experienced lifter, or an injury gets them back into the category of needing to master a pressing exercise skill
    4. Double up on the volume of upper pulls and assisted exercises of elbow extensors.  Overload the volume of all of the pulls – GH extensors, scapular retractors and depressors, GH horizontal abductors, elbow flexors.  Comlex and isolated movements! Having a strong “base” is extremely important to the art of maximal pressing.  Sheer elbow extensor strength and strength endurance is crucial to the art of the press – with a barbell or DB (even though its more prominent with a barbell)
    5. Use more DB with overhead athletes; but not with younger high school and pre-high school athletes.  Not because its more “specific”.  But because more horizontal adduction is required and that is a crucial biomechanical action that needs more volume.
    6. Use a Neutral Grip bar with athletes with neurological inhibitions of GH internal rotation.  The obvious reason is that it limits the amount of GH internal rotation with the pressing motion.
    7. Use a good volume of true max effort work (90% and above) in a given 3-week microcycle – even with high school athletes.  And don’t be afraid of max effort work with DB and SA DB – same concept
    8. Use Floor Pressing as a standard in every phase macrocycle (example summer 8-week macrocycle before training camp.  It’s a phenomenal tool to maintain the proper intention of the exercise of pressing


DYNAMIC STRENGTH / REVERSAL STRENGTH

Dynamic Strength is just like it sounds – pressing a specific load as fast as possible through a range of motion as opposed to the overall amount of load that can be pressed through the range of motion.  This type of strength is extremely important to sport.  Absolute strength sets the base, enhances the contractile capability of the motion, and improves quality of the contraction.  The dynamic motion is a shift to more true “specificity”.  In discussing real specificity, think in terms of the contraction, not just the motion.  Dynamic contractions are specific to sport because sport is dynamic.


Reversal strength is using the stored elastic energy off of an eccentric contraction to a stretch reflex that contributes to a more powerful concentric contraction during the press.  Dynamic strength and Reversal Strength are thus completely related.  Each will have a more positive effect on the other.  Also keep in mind that an “X” isometric (no pause – a quick eccentric-concentric action) is not always required to build reversal strength.  It takes an extremely experienced lifter, and a ton of absolute eccentric strengthening over time to safely and efficiently hit an XXX tempo on an upper press.  The potentiation factor of a fast eccentric (1 or X on the eccentric) will raise the threshold.  Even if the stretch reflex isn’t used during a loaded press, doesn’t mean that the reversal strength isn’t being trained.  Muscle contraction is all about the threshold.


Guidelines for Dynamic Strength:

  1. Build and micro-progress the tempo over time of a training cycle.  Using a tempo structure of ECCENTRIC-ISOMETRIC-CONCENTRIC, and with “X” noting “as explosive as possible”.  Work your way into an XXX tempo, if at all.  Many of our elite, most experienced lifters never progress beyond a 11X or X1X in a macrocycle
    1. 21X
    2. 11X
    3. X1X
    4. XXX
    5. Build as much eccentric and isometric strength as possible.  Raising the threshold of stored elastic energy off of an eccentric is crucial to the stretch reflex action.
    6. Contract hard during the isometric holds.  The intention of the exercise at various phases of the range of motion is just as important as the exercise selection
    7. Don’t be afraid to change the intension with external forces!  The faster the contraction, the more difficult it is to control the actual intention of the press.  Using bands, slingshots, and manual resistance on above or below the elbow joint to create a variation of intention of “out” or “in” at various phases is a great development tool for dynamic work
    8. Always use variable loading.  Simple concept of accelerating through the end range of motion of the press can be safely and efficiently executed with accommodating resistance.
      1. Simple progressions of chains to multiple chains to bands
      2. Use all forms of bands and progress based on tention:  mini, micro-mini, micro, light, etc.
      3. Use Speed-Strength (1.0+ m/s)  and Strength-Speed components (0.7 to 1.0 m/s).  They are both necessary components of dynamic and reversal strength
      4. Use an analytical component (Tendo is the easiest to use and most efficient).  Best tool for the money,and absolutely essential to specific progressions
      5. Set a good base of absolute strength and learning of the art of the press as a preclude into pressing.  However, don’t follow guidelines of “how much” pressing absolute is necessary for dynamic and reversal work.  Other than Powerlifting, this doesn’t really apply.  Don’t rush inexperienced, weaker lifters into dynamic with variable loading before they have at least mastered the art of the press.  However, DON’T wait until they can “bench a certain amount.”  Some athletes can do speed work without even getting a ton of maximal work.  Speed strength is an essential form.  If someones maximal capability happends to be less than another, doesn’t necessarily mean he/she should not do dynamic work.  Set the base, but incorporate lighter, variable loaded dynamic work as soon as the art is perfected.


STABILIZING STRENGTH

Stabilizing strength should never be confused with what a lot of people are labeling as “functional strength.”  Remember that unilateral work, DB work, standing cable/band presses, using unstable surfaces does not make things more “functional.”  Training “function” of a sport or movement mean to incrase the capabilitiy of the motion.  If there is an inhibition and/or weakness of a specific muscle involved in a motion, simply activating and/or strengthening that muscle via isometrics and isolation exercises is the most “functional” thing you can do.  Because that system will lead to the greatest function.


However, keep in mind that stabilizing strength is important.  For this purpose, stabilizing strength has a lot of independent variables and forces involved of the smaller muscles that cross and stabilize a joint involved in the motion.  Great examples for upper pressing is the muscles that are involved in protracting the scapula and upper rotating the scapula.  Protraction of the scapula will definitely occur during an upper press.  And, depending on the position of the GH joint during the press, upper rotation of the scapula will occur.  Isolating these type of muscles is crucial to the stabilization factor of a pressing motion


Guidelines for stabilizing strength:

  • Use a variety of exercises to accomplish many forces around movement of the scapula
    • Flys
    • Punches
    • Scapular pushups
    • Scapular punches
    • Scapular raises
    • Perform higher tempos and a lot of time under tension.  Gain as much cross-bridging as possible to elicit a response of the smaller tissue of these involved muscles
    • Work great as a beginning preparation before heavy multi-joint pressing and as a complex to keep the actively stimulating this tissue

Upper Body Strength-based Preparation

UPPER BODY STRENGTH BASED PREPARATION/WARMUPS

Pete Bommarito, MS, CSCS, USAW, MATS, MAT JS


For any upper-body strengthening program to truly be efficient, there must be proper joint preparation.  This is beyond just a standard “warm-up”.  This is really focusing on preparing the joints for the motions that will be encompassed within the session.  It’s also important to remember this type of preparation of the joints is a training system over time – not just to prepare for the succeeding workout.  As with any warm-up / preparation, the stimulus can be overloaded over time, as the various systems of strength are increased and overloaded throughout the overall program.


The obvious basics of strengthening always centers on these main aspects – absolute strength, speed strength, dynamic eccentric loading, and reversal strength.  No matter what the “theme of the day” is – one (or more) of these main four aspects are centered within two primary upper body motions – pressing strength, and pulling strength.  To properly prepare joints for all aspects of strength with pressing and pulling motions, an understanding of all of the main joints and main joint motions for the upper body is essential:

  • Shoulder flexion (to humerus parallel to ground)
  • Shoulder flexion continued overhead
  • Shoulder abduction
  • Shoulder adduction
  • Shoulder extension
  • Scapular protraction
  • Scapular retraction
  • Scapular elevation
  • Scapular depression
  • Humeral rotation

There are many variations and subdivisions of each of these motions (such as shoulder horizontal abduction/adduction, elbow flexion/extension), but for simplicity purposes, the focus will be on these aforementioned motions.


No matter what form of the four main aspects of strength for either pressing motions or pulling motions encompassed within with exercises for the workout, a combination of each of these joint motions will be utilized.  Hence, it is always good practice to encompass these motions with slow controlled tempos and isometrics at various ranges to properly warm-up and prepare for the workout.  The following exercises use one or more of the motions described above.  These exercises can be referenced in the Exercise Database section of the online University (Strength, Upper Body, Auxillary).  Again, it is necessary to understand the following exercises can be overloaded over time – by increasing the load (or weight), increasing the tempo, and/or increasing the isometric hold at various angles.


Shoulder V-Raise (thumbs up) / Rotate

–       Shoulder flexion (to humerus parallel to ground)

–       Humeral internal/external rotation at a shoulder flexed position

–       Isometric strengthening at a shoulder flexed position with isometric scapular retraction at this flexed position

–       Shoulder extension


Shoulder T-Raise (palms down) / Shrug

–       Shoulder abduction

–       Scapular elevation

–       Scapular depression

–       Isometric strengthening in shoulder abducted position with isometric scapular retraction at this abducted position

–       Shoulder adduction


Shoulder V-Y Raise (thumbs up)

–       Shoulder flexion (to humerus parallel to ground)

–       Continued shoulder flexion overhead 

–       Shoulder extension 

–       Isometric strengthening in shoulder flexed position with isometric scapular retraction at this flexed position

–       Shoulder extension


Shoulder T-Raise / Rotate

–       Shoulder external rotation

–       Shoulder abduction in externally rotated position 

–       Shoulder internal rotation in abducted position 

–       Shoulder external rotation in abducted position 

–       Isometric strengthening in shoulder abducted position with isometric scapular retraction at this abducted position 

–       Shoulder adduction in externally rotated position 


Scapular Pushups (hands)

–       Scapular retraction

–       Scapular protraction


Scapular Pushups (elbows)

–       Scapular retraction

–       Scapular protraction

–       Note that this scapular retraction and protraction is with the intention of pressing isometrically into shoulder horizontal abduction.  Because the entire forearm is on the ground, it’s easy to perform a good isometric contraction into horizontal abduction (pushing out) while the concentric/eccentric action of scapular retraction/protraction is occurring.  This is the main difference between the Scapular pushups from the hands or elbows – the elbows allows for this unique intention, which changes the exercise completely.


As stated earlier, there are many different exercises and variations of exercises that can accomplish the goals of:  preparing for the immediate workout; and develop an increased tolerance to loads of future workouts.  This 6-exercise systems definitely is a great place to start because it encompasses isometric, concentric, and/or eccentric strengthening / preparation of all motions of the shoulder and scapular required during any variation of exercises for pressing strength and pulling strength.  Examples:

–       Standard bench/board/floor press exercise – there is isometric contraction of the scapular retractors, with concentric shoulder horizontal abduction and elbow extension; with slight scapular protraction at the end of the press.

–       Standard rowing exercise – there is scapular retraction, with concentric shoulder extension (and possibly shoulder horizontal abduction, depending on the row variation) with elbow flexion; and isometric contraction of the scapular retractors during the eccentric action of the row with scapular protraction at the end of this eccentric

–       DB pressing/rowing  depending on the variation of the use of the DB press or row, there can be humeral internal/external rotation involved.


This provides a great basic summary of the actual joints (and joint motions) involved in the primary exercises during a typical upper body workout.  An efficient way to prepare for increased loads of pressing and pulling for the workout would be to “warm-up” with these joint motions with low loads, slow tempos, and isometric contractions at key points in the ranges of motion.

The Back Box Squat

By: Adam Boily, MS, USAW, MAT Jumpstart, BPS Level 1

The Back Squat
At Bommarito Performance Systems (BPS), the squat is one of our most
utilized exercises.  It recruits almost every muscle in the body and may be the “best”
lower body exercise.  There are many variations of the squat exercise depending on
the intention and goal of the athlete.   For example, BPS commonly prescribes a box
squat by using a standard Olympic lifting bar, cambered bar, safety squat bar and/or
a belt squat.  Traditionally and most frequently at BPS, the Olympic lifting bar is
used when an athlete does a squatting exercise.  The cambered bar is a good
alternative for throwing athletes because this bar may be used with less shoulder
extension/external rotation.  Thus, reducing the stress placed on throwing athletes’
shoulders during offseason training.  Furthermore, this same concept may be
applied to the advantages of using a safety squat bar.  Perhaps an athlete has a trunk
and spine issue and placing an external load on athletes’ shoulders is not desirable.
In this scenario, the belt squat may be the best option.  Typically, the intention or
GOTE (Goal Of The Exercise) of the squat exercise, no matter the variation, is to
increase lower body hypertophy, strength, and/or concentric power (and in some
cases – high speed eccentric loading).

BPS frequently utilizes the placement of a box behind the athlete when
performing the back squat (no box need for a front squat).  This box serves many
purposes such as providing a gauge for when the athlete should cease the eccentric
portion of the lift and either begin the concentric portion or execute an isometric
hold before initiating the concentric action.  The height of the box can be modified to
each athlete according to his or her height.  The height of the squat can sometimes
be determined by the off-season phase.  For example, sometimes we do very low box
squats, of the “Olympic Style”; especially when we’re trying to emphasize the knee
extensors more.  Other times it’s appropriate to execute “high box” squats – using
supra-maximal loading for changes in neural development.  In terms of just
analyzing what is appropriate for an athlete if you want to execute a typical box
squat just below parallel, it can be identified during a simplistic AROM (Active
Range of Motion Exam).  This is the point at which full control over the joints can be
maintained throughout the squatting range of motion (especially around the lumbo-
pelvic joints).

Most BPS exercises are accompanied by a tempo, which a coach may employ
to determine the time under tension for any exercise.  This tempo tells the athlete
the duration of the eccentric, isometric, and concentric portions of the exercise.  It is
important for a coach to control the tempo based on the GOTE.  For example, an
athlete performing the speed squat (traditionally used with variable resistance i.e.
bands or chains) with novice experience may have a 21X tempo (eccentric 2,
isometric 1, and concentric X or fast).  If the athlete is considered to have advanced
level experience and has followed a proper periodization, it would be beneficial to
employ an X1X tempo for the speed squat.  The isometric (1 second hold) is
executed when the athlete has his or her gluteus Maximus barely touching the box
placed behind the athlete.  The isometric phase of the speed squat is a crucial
training effect for minimizing the stretch reflex that occurs throughout sport such as
jumping or sprinting.

Another advantage of using an isometric pause on the box during the box
squat is it allows the lifter time to consciously drive or push his or her knees
laterally to avoid a harmful valgus moment, which is commonly experienced during
the squat exercise.  It is at this moment that the knee joint can become
compromised, as it is not in a stable closed-packed position.  The coach should offer
a coaching cue to the athlete with the intention of avoiding valgus knee moment.
The box allows the athlete to easily identify where he or she must isometrically
pause and wait for a loud “hit” command from the coach, which triggers the athlete’s
fight or flight response and helps to increase the athlete’s concentric power (the
GOTE).  In conclusion, it is this concentric power that can be enhanced with the
proper utilization of the box squat accompanied with the appropriate tempo.

Many examples of tempos:

311

212

21X

11X

X1X (usually done with low intensity, but very high variable loading)

Screenshot_2015-05-13_14.53.05